How to Dual Boot Windows 10 and Windows 7
by Alan Pfahler on January 3, 2023To dual boot windows 7 and 10 you can install both Operating Systems on the same hard drive (different partitions). NOTE: If you already have Windows 7 installed, you can follow this guide to dual boot Windows 10. But if you are testing dual boot windows 7 and 10, you have to install Windows 7 first. Then install Windows 10. Not the other way round.
Be sure you have backups of your important files before doing this.
Step 1 – Resize Your Windows 7 Partition to Make Space
First, you’ll need to make space for Windows 10 on your hard drive. If you have two different hard drives or two partitions, you can skip this part. But you’ll probably want to install Windows 10 alongside Windows 7 on the same hard drive, Please follow the steps below.
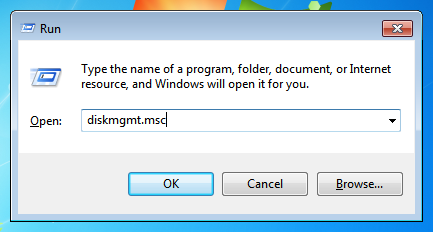
- Press Windows Key + R, type diskmgmt.msc into the Run dialog, and press Enter to launch it.
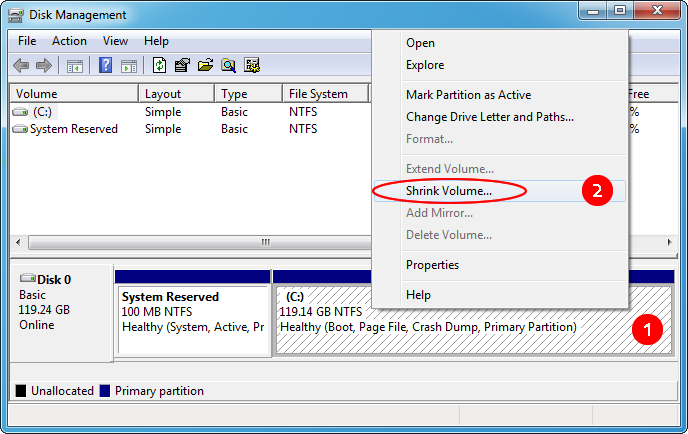
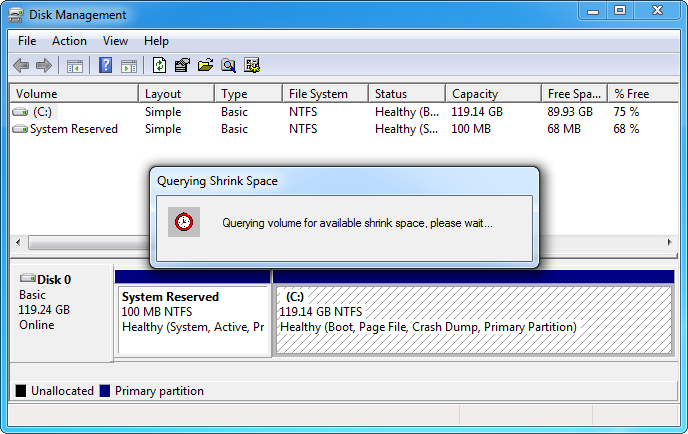
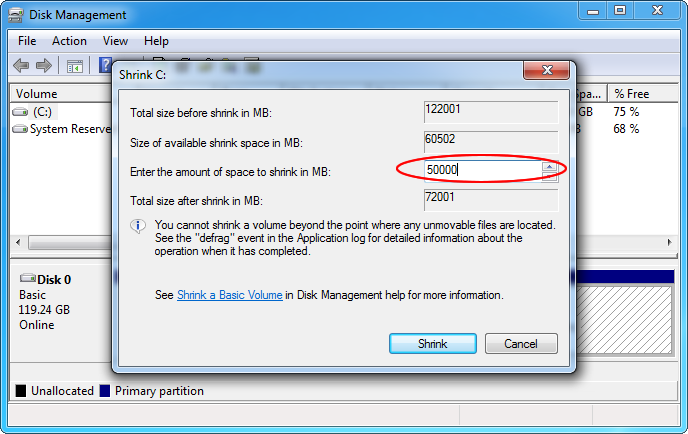
- Locate your system partition — that’s probably the C: partition. Right-click it and select “Shrink Volume”. A message will appear as shown in the second image below. Wait for the query to complete. (If you have multiple partitions on your hard drive, you could also choose to resize a different partition to free up space)
- In the "Shrink C:" dialog box, Enter the number of megabytes to shrink the Windows 7 partition. Make sure that you choose a value that’s large enough for Windows 10, which requires at least 30 GB (30,720 MB) of free space. Once done, press the Shrink button.
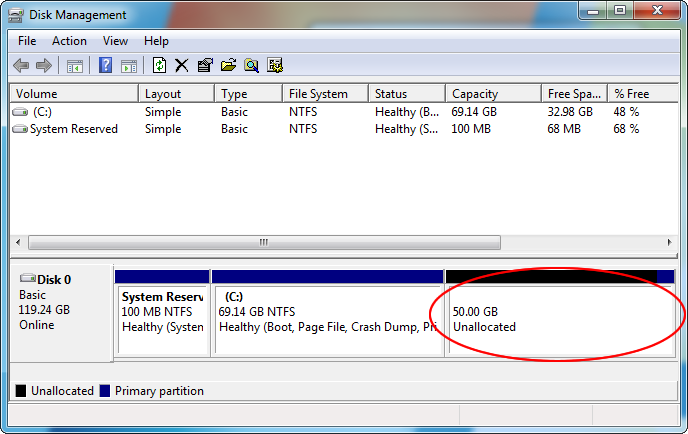
- After the shrinking is done, a new unallocated space is now available. You will install Windows 10 in this disk space. You are almost ready to dual boot Windows 7 and 10!
Step 2 – Install Windows 10 Alongside Windows 7
You need a Windows 10 bootable USB flash drive.
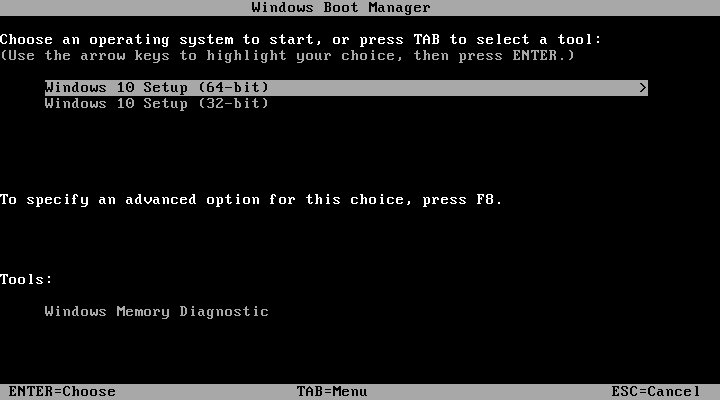
- Insert the Fastoe Windows 10 USB drive to computer. Power on or restart computer. When vendor logo appears on screen, press Boot Option Key repeatedly until Boot Menu appears, select "Fastoe USB Flash Drive" or "USB: AI Mass Storage" as a boot device.
- When the message "Windows Boot Manager" appears on the screen, choose Windows 10 64-bit or Windows 10 32-bit system, press ENTER.
- Select your language, time zone and keyboard, then click Next.
- Click the Install Now button to prepare for Windows 10 installation.
- If you have a Windows 10 key, enter it. Alternatively, click I don’t have a product key. Click Next, then select your edition. Click Next.
- Accept license agreement and click Next.
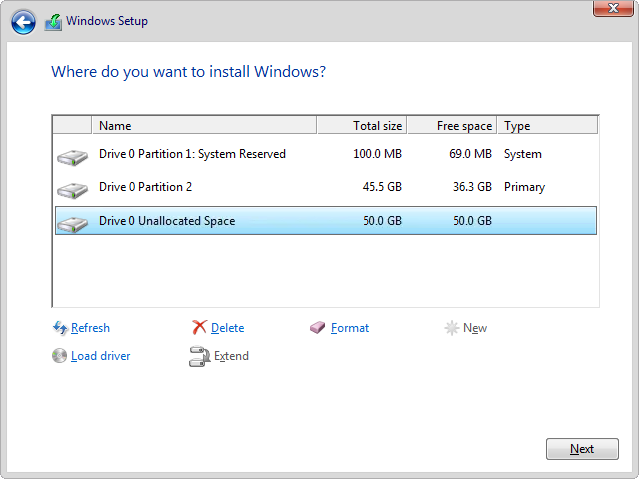
- On the Which type of installation do you want?, select Custom: Install Windows only (Advanced).
- Then select the unallocated space you created in Step 1. Click Next.
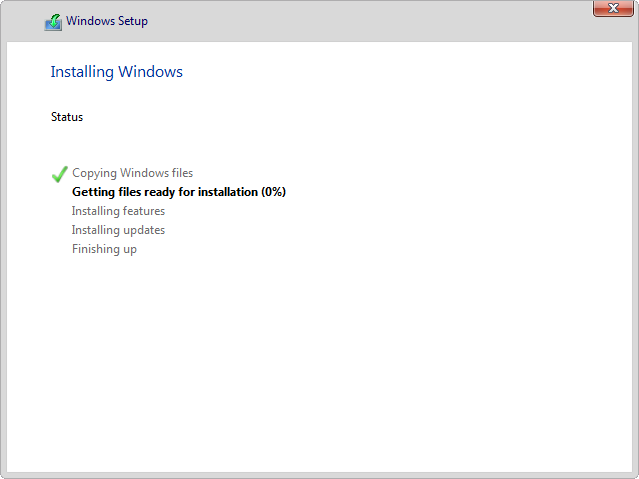
- Wait for the installation to complete.
- After the installation, remove the installation USB disk, follow the steps in Complete Windows 10 installation to complete the remaining parts of the installation.
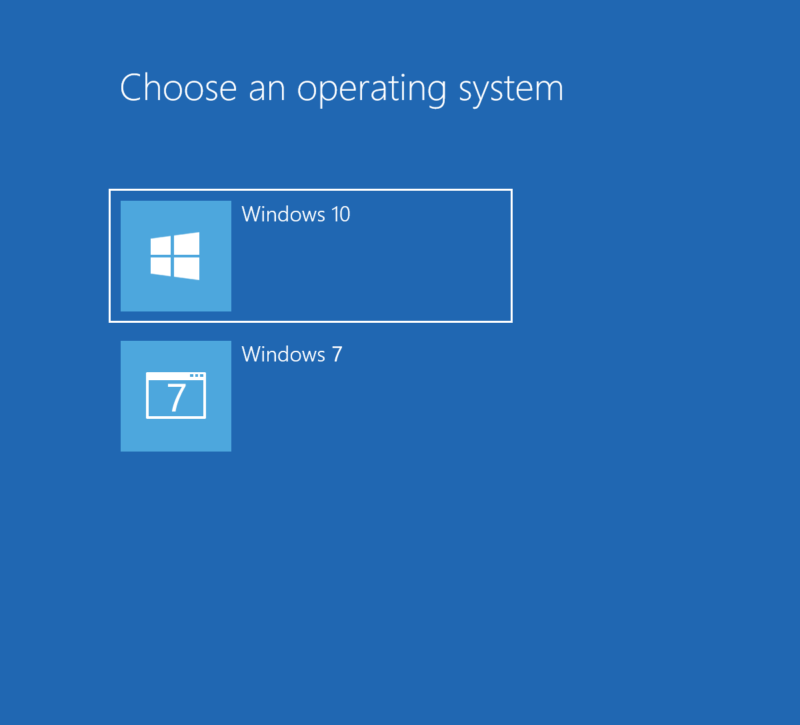
- Once you finish installing Windows 10, your computer is ready to dual-boot. Whenever you start or restart your PC, you’ll be asked what operating system you want to boot into: Windows 10 or Windows 7.