How to Turn a USB Printer Into a Wireless Printer: Part 1
by Alan Pfahler on October 30, 2020There are three USB printers in the Fastoe office (GPrinter GP-1134T, HP LaserJet 1020 Plus, HP DeskJet 1000),none of which supports wireless printing. Today we use a Raspberry Pi to build a wireless print server, print server can connect multiple computers to a single or multiple printers wired or wirelessly, you can access your printer with multiple devices and can send print commands from any of the connected devices to the printer.
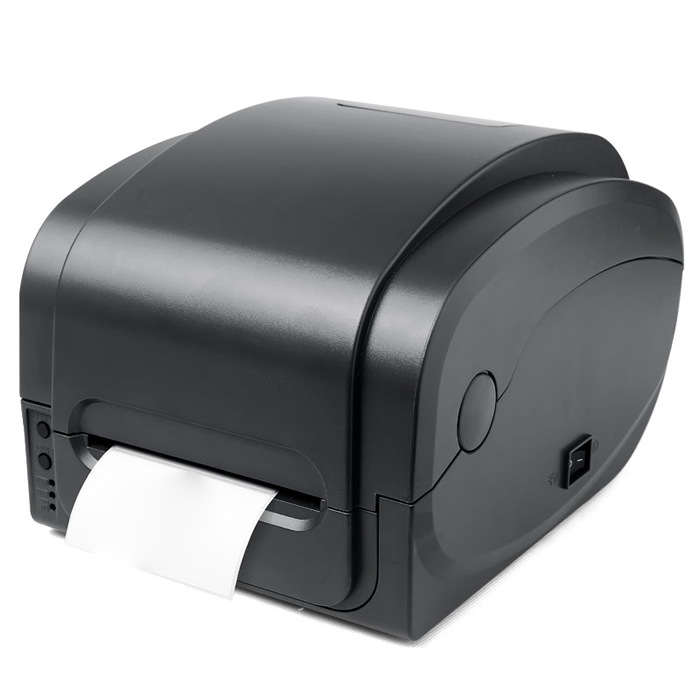
GPrinter GP-1134T
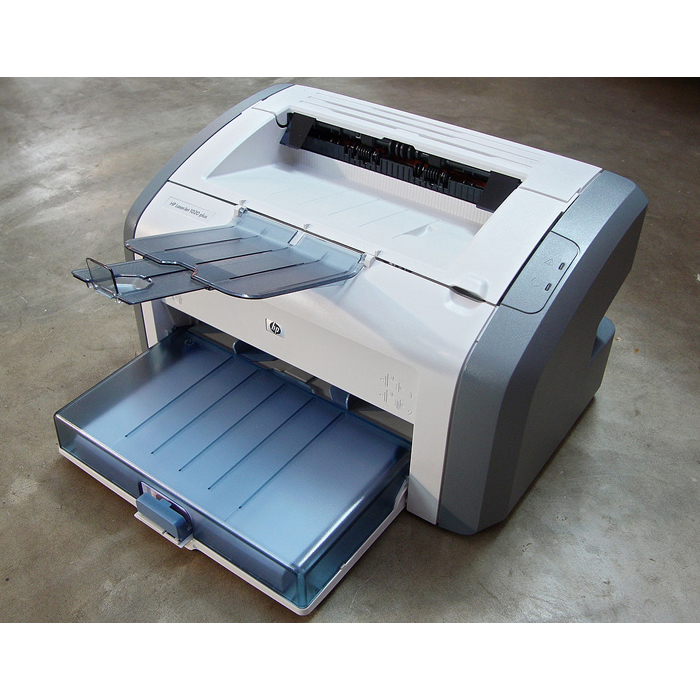
HP LaserJet 1020 plus
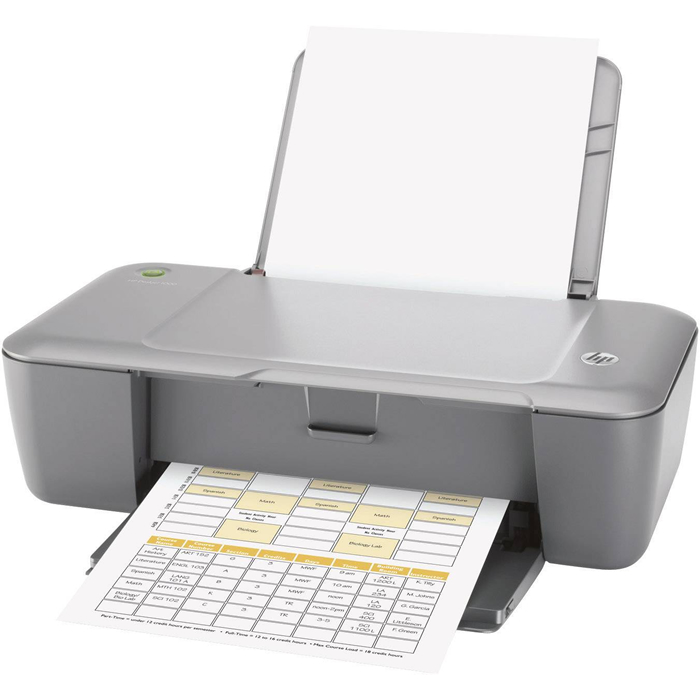
HP DeskJet 1000
Requirements
- Raspberry Pi (2/3/3B+/4B) & Power Supply
- Fastoe Pre-Installed NOOBS MicroSD Card (32GB or Higher)
- USB Printer
NOOBS is an easy operating system installer which contains Raspberry Pi OS, we recommend that beginners start with the "New Out of Box Software" (NOOBS) operating system for the Raspberry Pi.
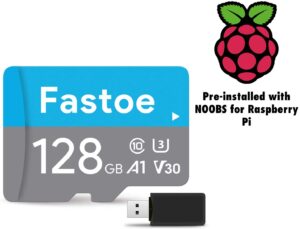
Fastoe NOOBS SD Card
Setting Up Raspberry Pi
- Connect Pi to a monitor, keyboard and mouse. Insert the Fastoe NOOBS micro SD card into your Raspberry Pi, and plug the Raspberry Pi into a power source.
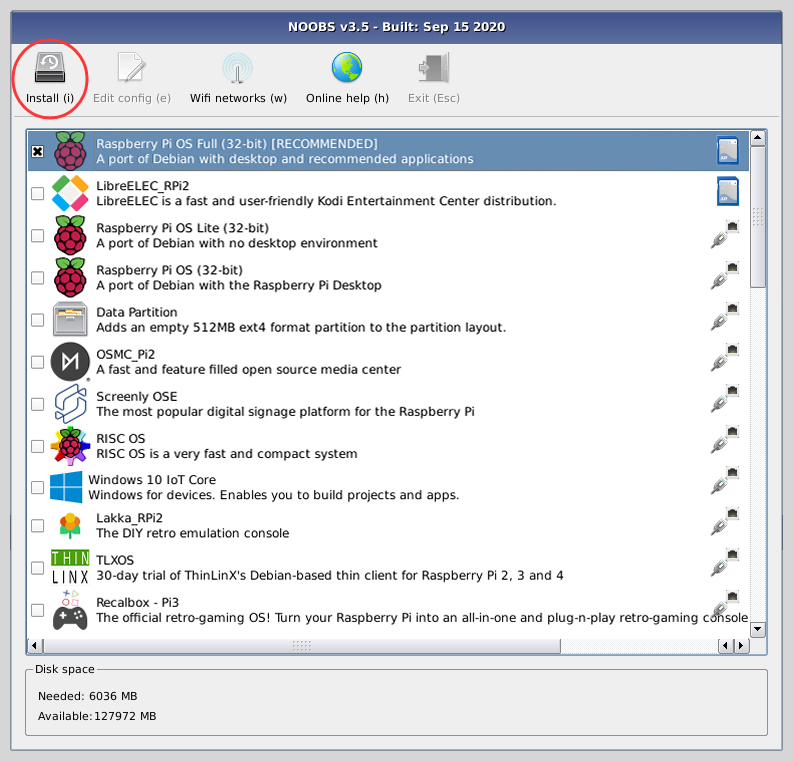
- You will be offered a choice when the installer has loaded. You should check the box for
Raspberry Pi OS, and then clickInstall.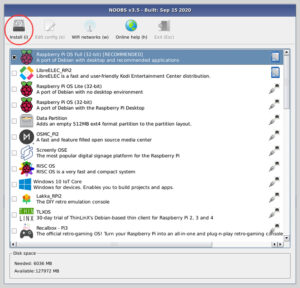
- It will take a while, waiting for install to complete.

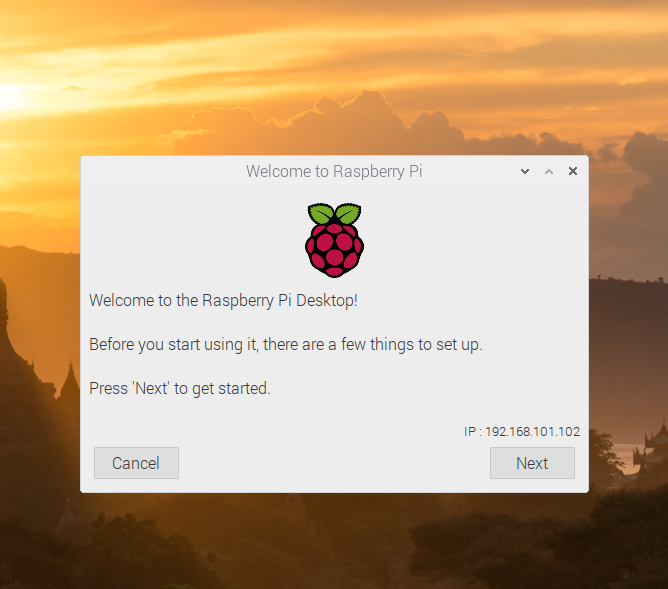
- When Raspberry Pi OS has been installed, click OK and your Raspberry Pi will restart and Raspberry Pi OS will then boot up.

- Complete the on-screen initial setup: setting the keyboard language, connecting to wireless network, setting the password for the regular user account pi, and setting the password for the system administrator account root. The default user is
pi, and the default password israspberry.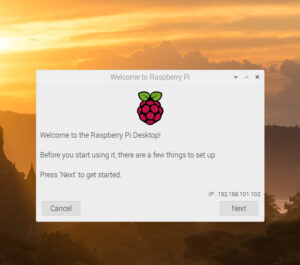
- We need to ensure that our Raspberry Pi has all the latest updates to the OS. To do this, open a terminal window.
sudo apt-get update
sudo apt-get upgrade
Finally reboot your Pi
sudo reboot


This completes the first part of our setup. Click here for next part, where we will setup our Raspberry Pi.