How to Turn a USB Printer Into a Wireless Printer: Part 2
by Alan Pfahler on October 30, 2020This is the continuation of the Part 1 of the article, where we covered the initial setup of our Raspberry Pi. If you have not setup your Pi, I recommend you to follow Part 1.
Setup Print Server Software CUPS
- Install CUPS
Open a terminal window,sudo apt-get -y install printer-driver-foo2zjs hplip cupsAfter installation you’ll need to give the pi user administrative rights on CUPS. To do this, go back to your console and type:
sudo usermod -a -G lpadmin pito make the pi user part of the lpadmin group.
-
Configure CUPS
We need to make some changes to the configuration file of CUPs. The config file can be edited using:sudo chmod 777 /etc/cups/cupsd.conf && sudo nano /etc/cups/cupsd.confChange/add the following lines to the configuration file. These changes will allow us to interact with CUPS panels.
sudo sed -i 's/Listen localhost:631/Port 631/' /etc/cups/cupsd.confWe need to allow access from any computer on the network, find these groups and add the Allow @local directive inside:
<Location />
  Order allow,deny
  Allow @local
</Location>

# Restrict access to the admin pages...
<Location /admin>
  Order allow,deny
  Allow @local
</Location>

# Restrict access to configuration files...
<Location /admin/conf>
  AuthType Default
  Require user @SYSTEM
  Order allow,deny
  Allow @local
</Location>
Save & exit (CTRL+X, y, Enter), the last step is to restart the CUPS service to apply changes:
sudo chmod 777 /etc/cups/printers.conf && sudo service cups restartYou can now access the web interface from any computer on the network.
- Adding Printer to CUPS
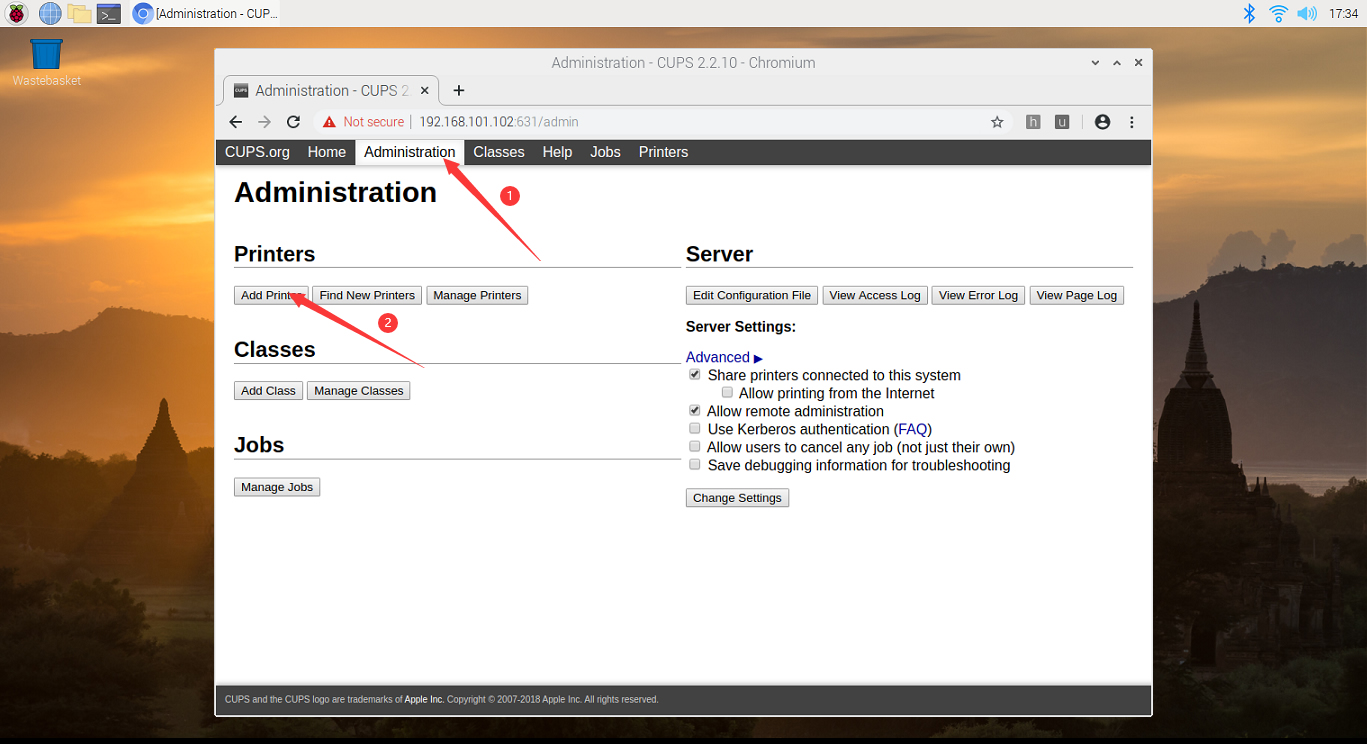
We can now add the printer using the CUPS web interface:- Open the CUPS web interface: https://<the Pi’s IP or hostname>:631.
- In the top bar menu, click on the
“Administration”menu. - Then click on
Add printer.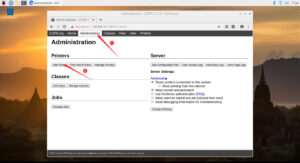
Add printer
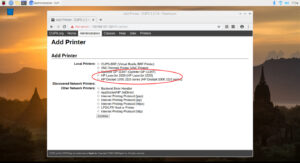
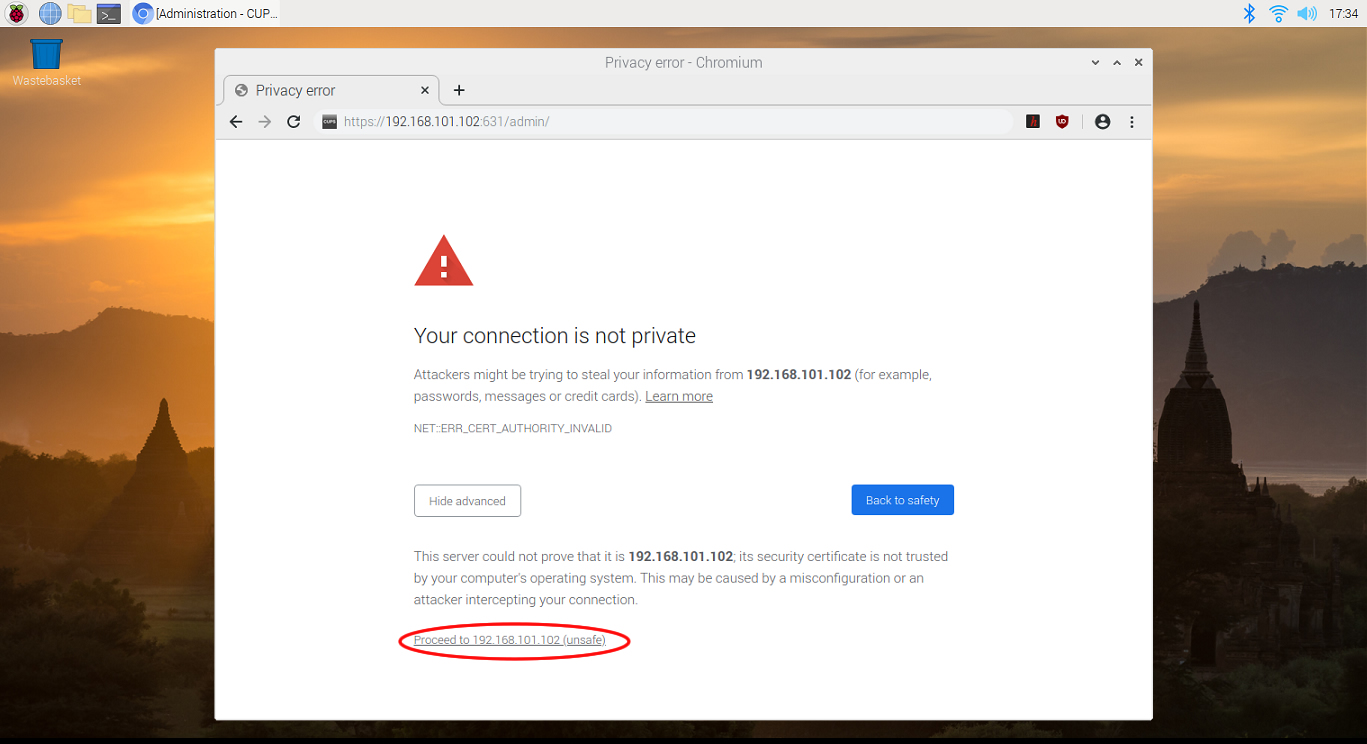
- If you receive a warning about the site’s security certificate, go ahead and click proceed anyway to ignore it.

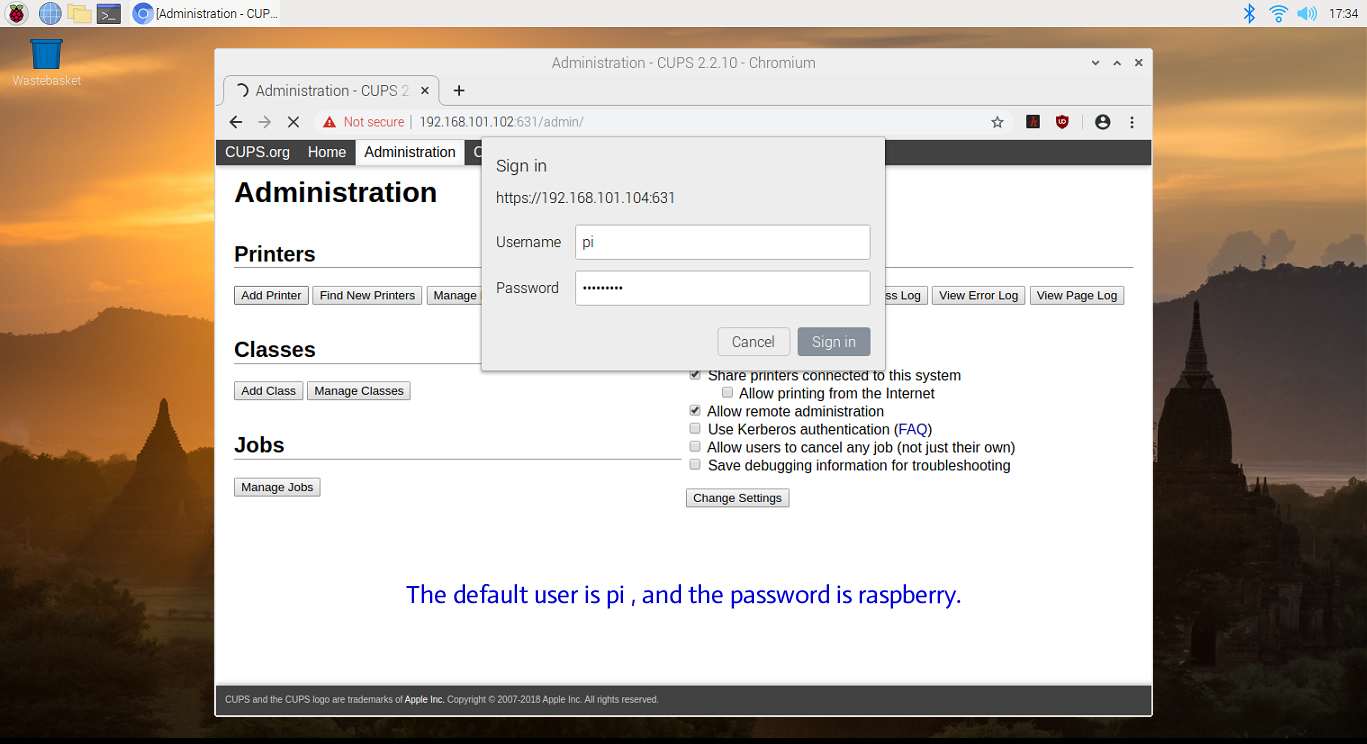
- You’ll be prompted to enter a username and password. (e.g. if you’re using a default Raspbian install, the login/password is “pi”/”raspberry”).

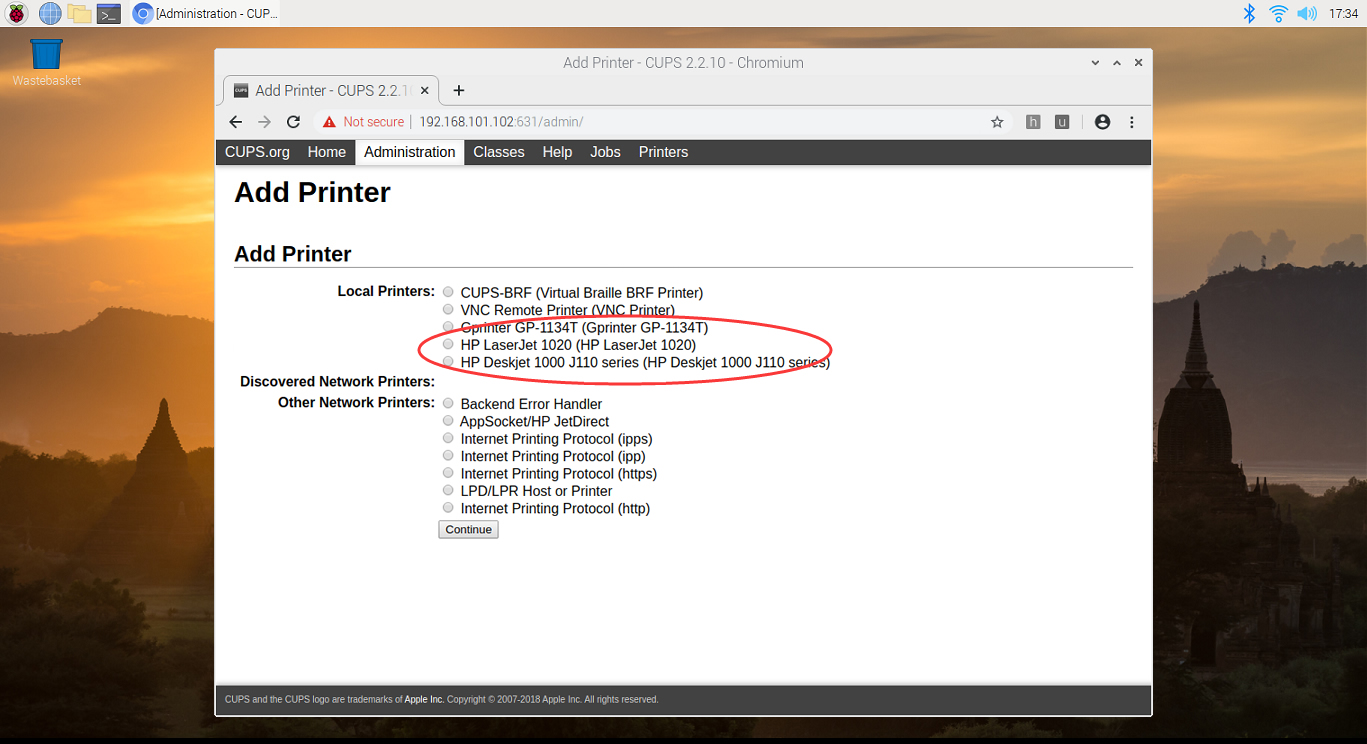
- After logging in, you’ll be presented with a list of discovered printers. Select the printer you want to add to the CUPS:
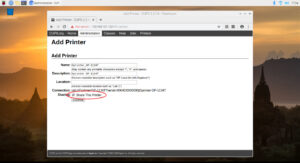
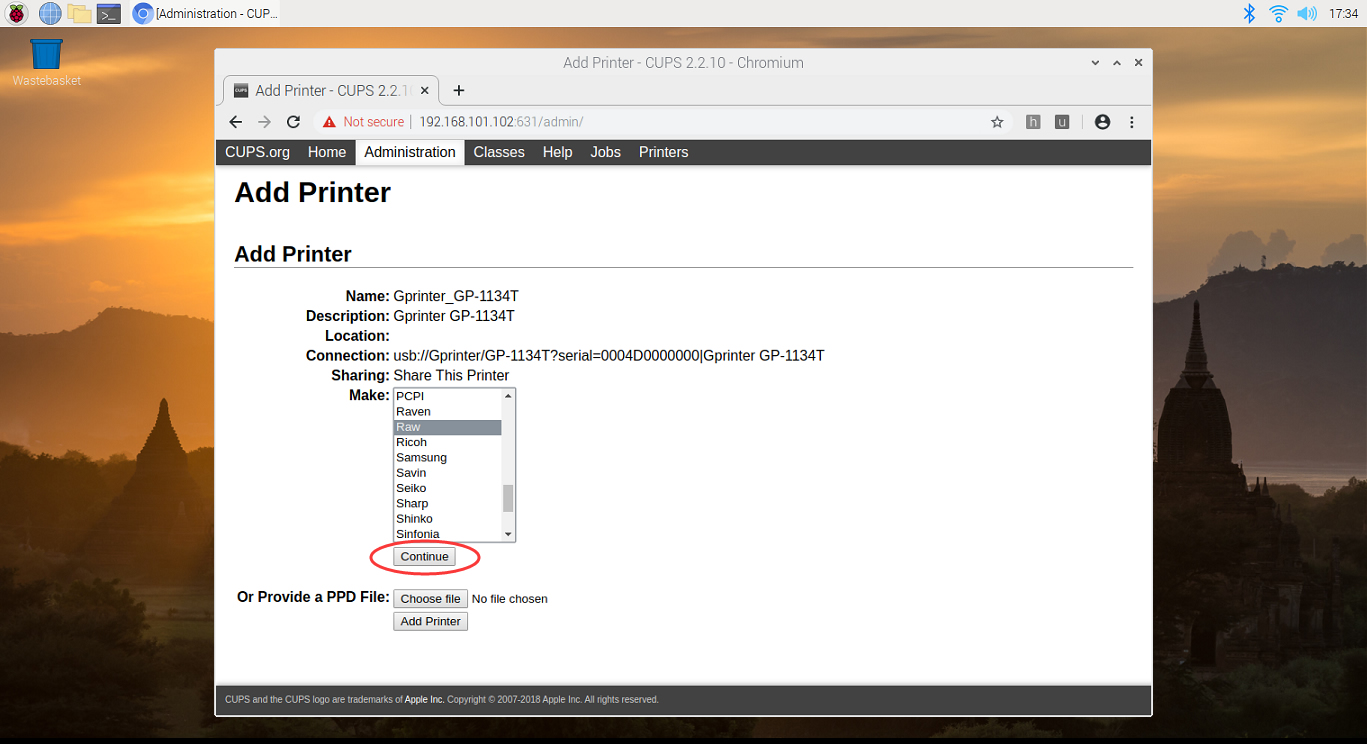
- After selecting the printer, you’ll be offered an opportunity to edit the name, description, and location of the printer. Ensure that "Share This Printer" is checked. Click "continue" until the process completes.
- You’ll be prompted to select the specific driver you want to use for your printer. Scroll until you see a model number that matches yours. Alternatively, if you have a PPD file for the printer that you have downloaded from the manufacturer, you can load that with the “Choose File” button, If you can't find the correct manufacturer and don't have a PPD file, then choose the "RAW". Click "continue".
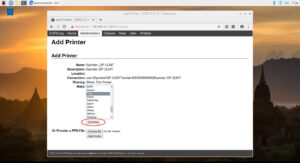
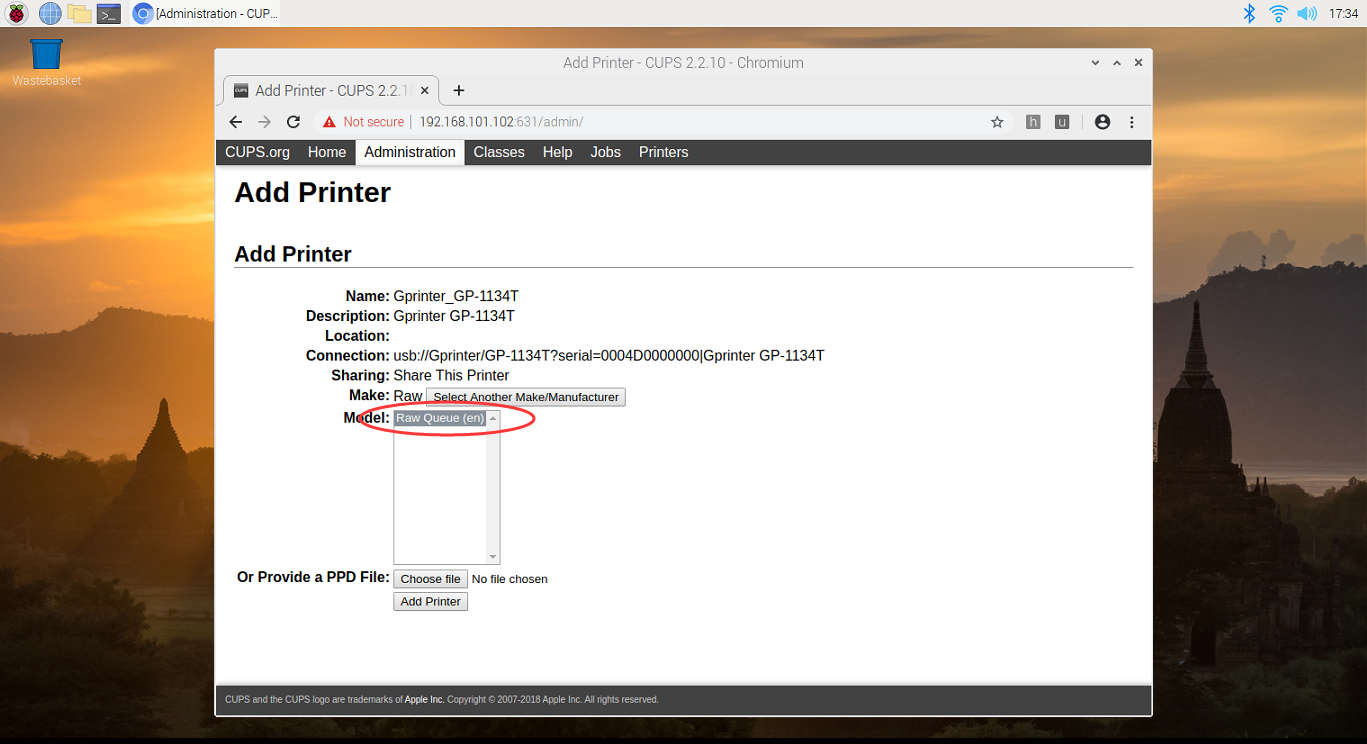
- Choose the specific model, if not exists, choose "RAW Queue (en)". and click "Add Printer" button.

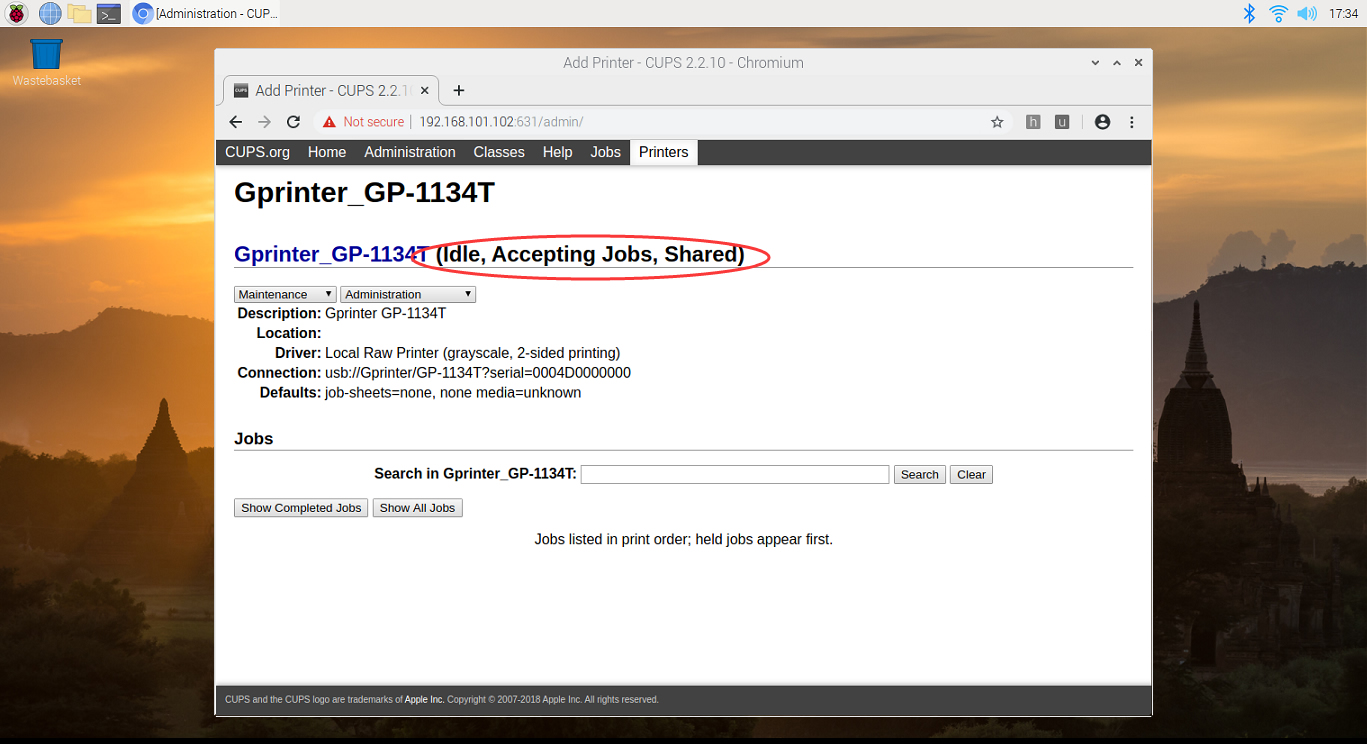
- After a few seconds CUPS should present you with the "Printers" tab, which should show you your connected printer. If everything is okay it should show that the printer is "Accepting Jobs".
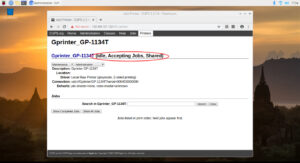
- Everything looks good.:)

This completes our CUPS setup. The final task is to send print commands using the connected devices. After this, you will be able to print using Windows, Linux, Mac, Android & iOS wirelessly. We need not install any printer drivers for that. Continue to the last part, where we finally print wirelessly.