How to Clean Install or Reinstall Windows 10 on a PC Step-by-Step Guide
by Alan Pfahler on October 25, 2021If you keep running into blue screen of death (BSOD) errors, or your PC is noticeably slower or hangs indefinitely, reinstalling Windows 10 is your best option to mitigate downtime and loss of work, and in this guide, we'll guide you through every step to complete the task.
Warning: Make sure to back up all of your important data (documents, pictures, videos, music, etc.) before you begin this process, you can back up data to another partition (such as D drive) or another disk. Note: If your windows 10 has crashed, you can back up the data in the WinPE environment, check out this post.
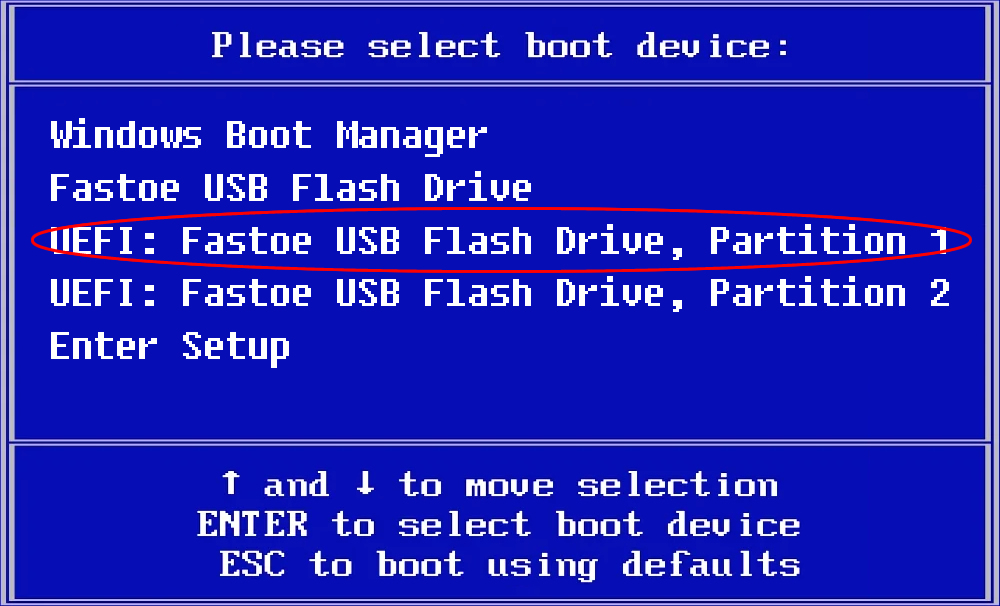
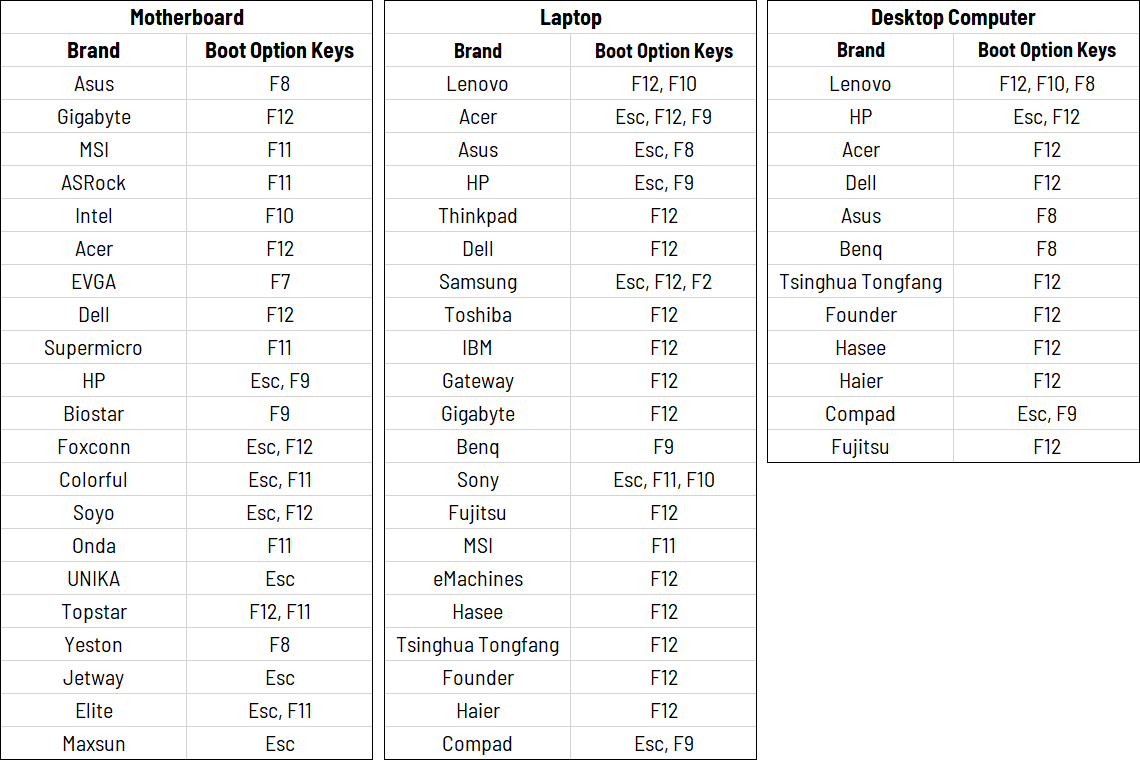
- Insert the Fastoe Windows 10 USB drive to computer. Power on or restart computer. When vendor logo appears on screen, press Boot Option Key repeatedly until Boot Menu appears, select
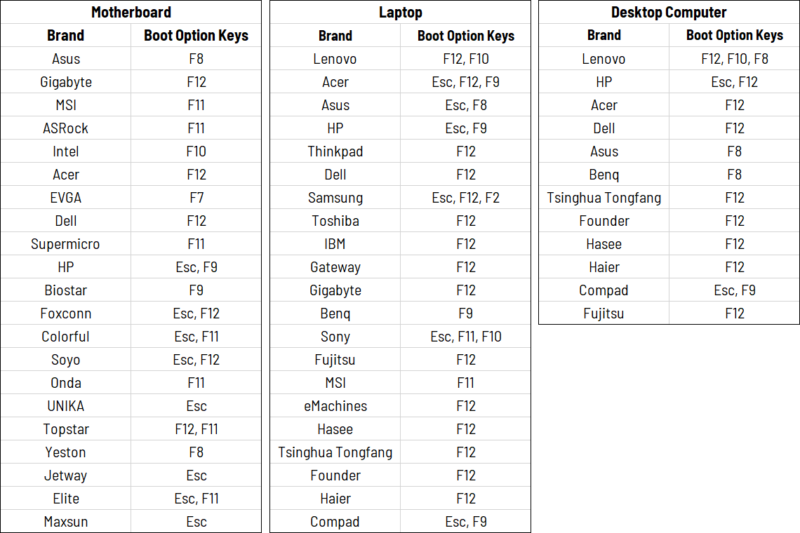
"Fastoe USB Flash Drive"as a boot device.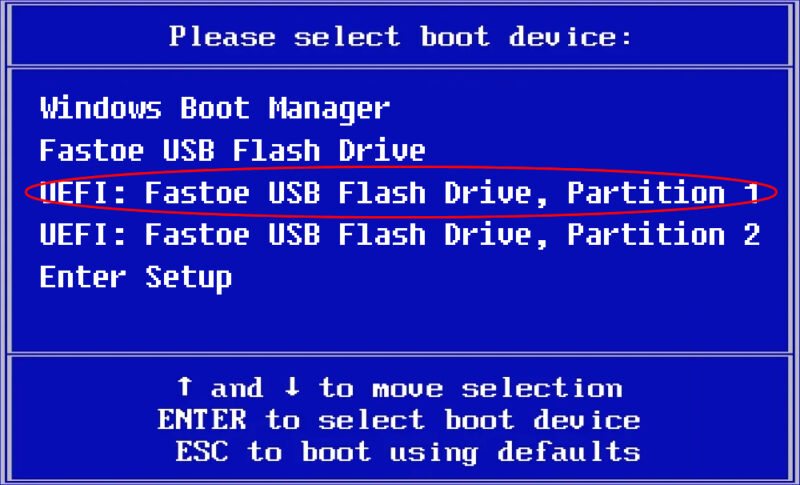 You can find the Boot Option Key for your computer from the following table.
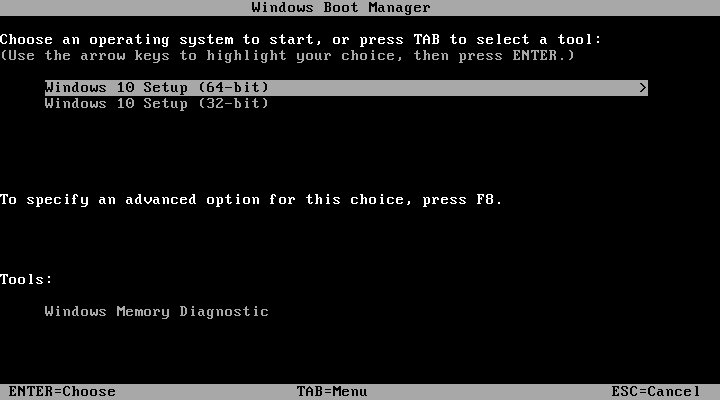
- When the message "Windows Boot Manager" appears on the screen, choose Windows 10 64-bit or Windows 10 32-bit system, press ENTER. (Windows 10 64-bit is recommended if you have 4 GB or more RAM. Windows 10 64-bit supports up to 2 TB of RAM, while Windows 10 32-bit can utilize up to 3.2 GB.)
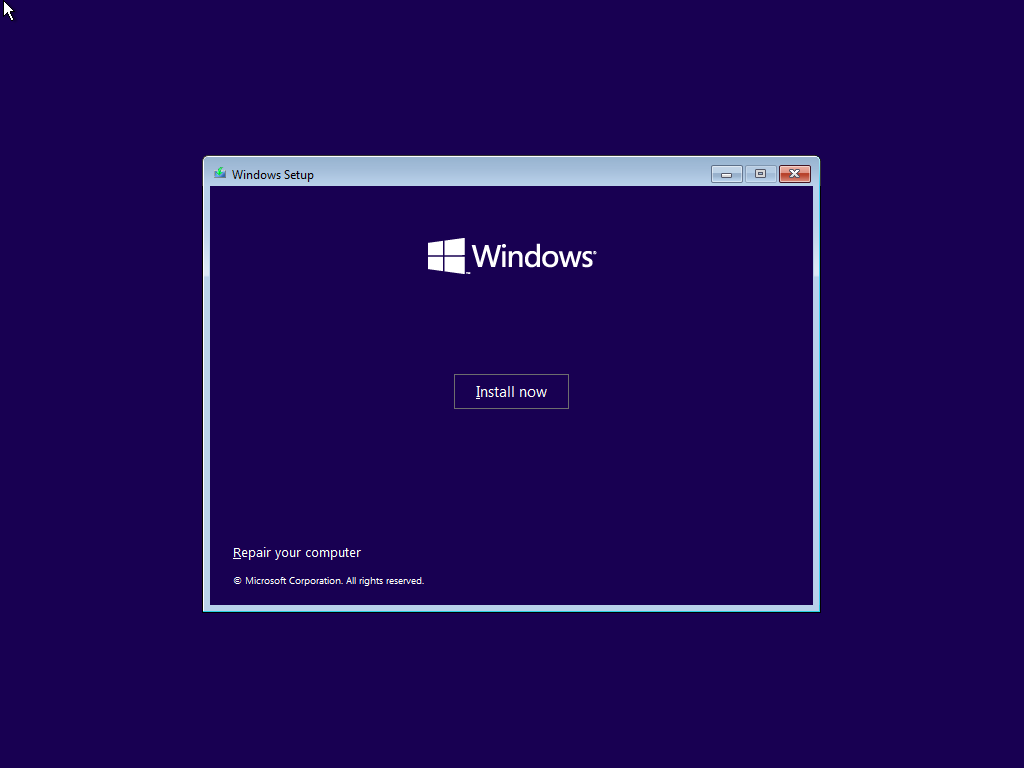
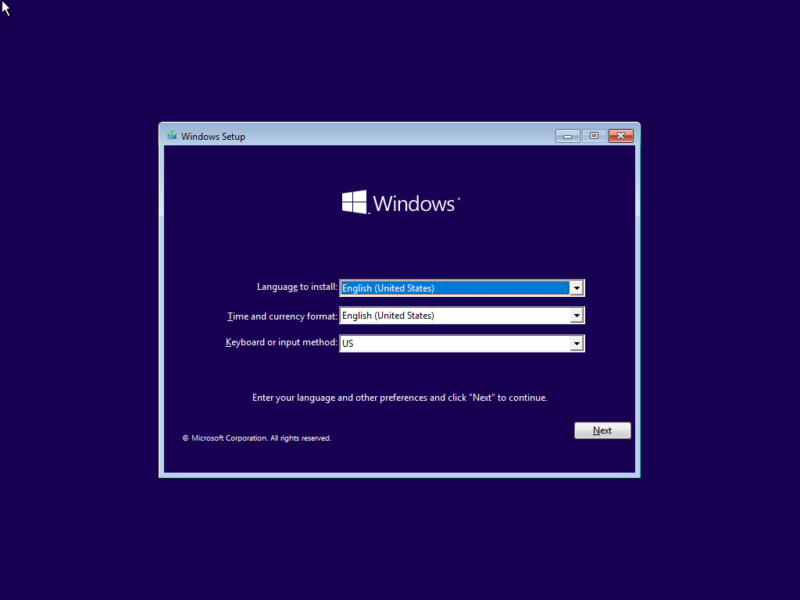
- When the Windows installation screen appears, complete the settings (language, time, keyboard layout, etc.) and click the Next button.
- Click the Install Now button to prepare for Windows 10 installation.

- When the Activate Windows screen appears, enter the product key for Windows 10 and click the Next button, or click the "I don't have a product key" link to continue.

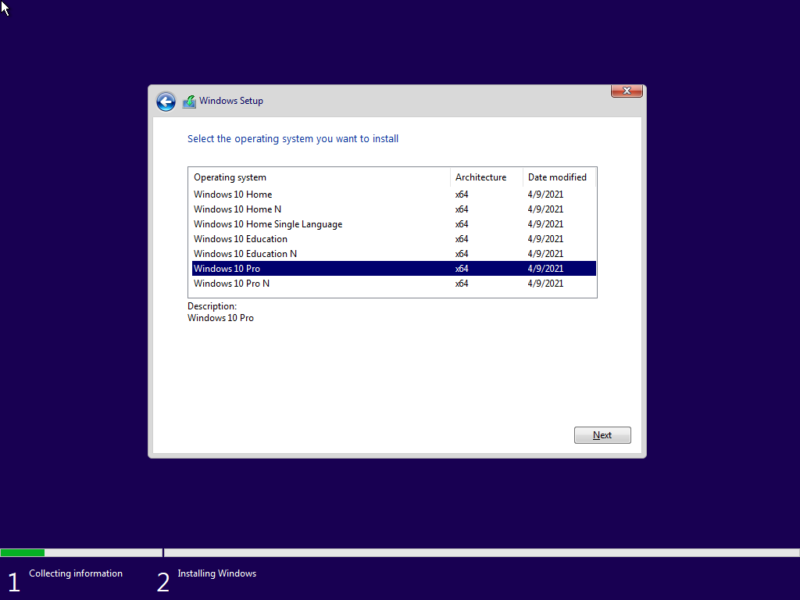
- Select the edition of Windows 10 (Windows 10 Home/Pro N is just windows 10 Home/Pro without Windows Media Player and related technologies pre-installed including Music, Video, Voice Recorder and Skype.), this selection must match the edition of the license activates, and click the Next button.
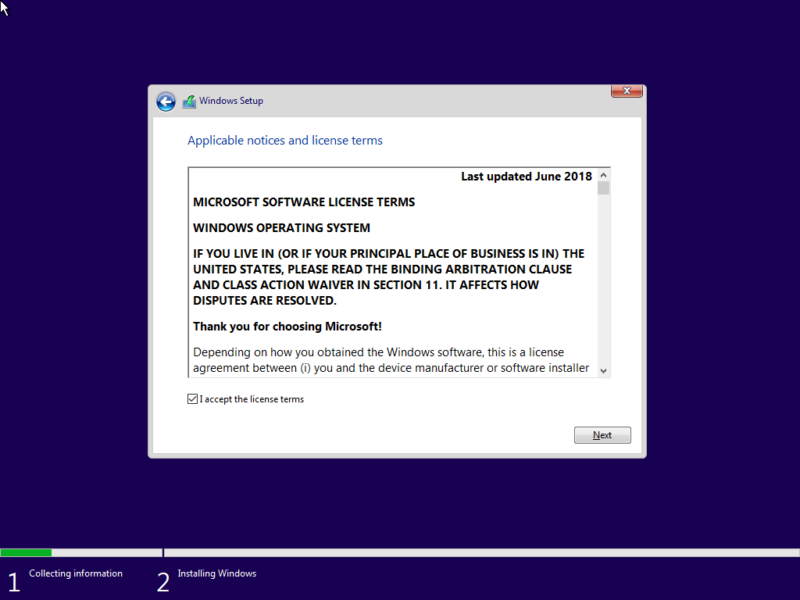
- Check the I accept the license terms option, and click the Next button.
- Click the Custom: Install Windows only (advanced) option to proceed with clean install. Note: All user data will be deleted. Please ensure that you have the corresponding backups.

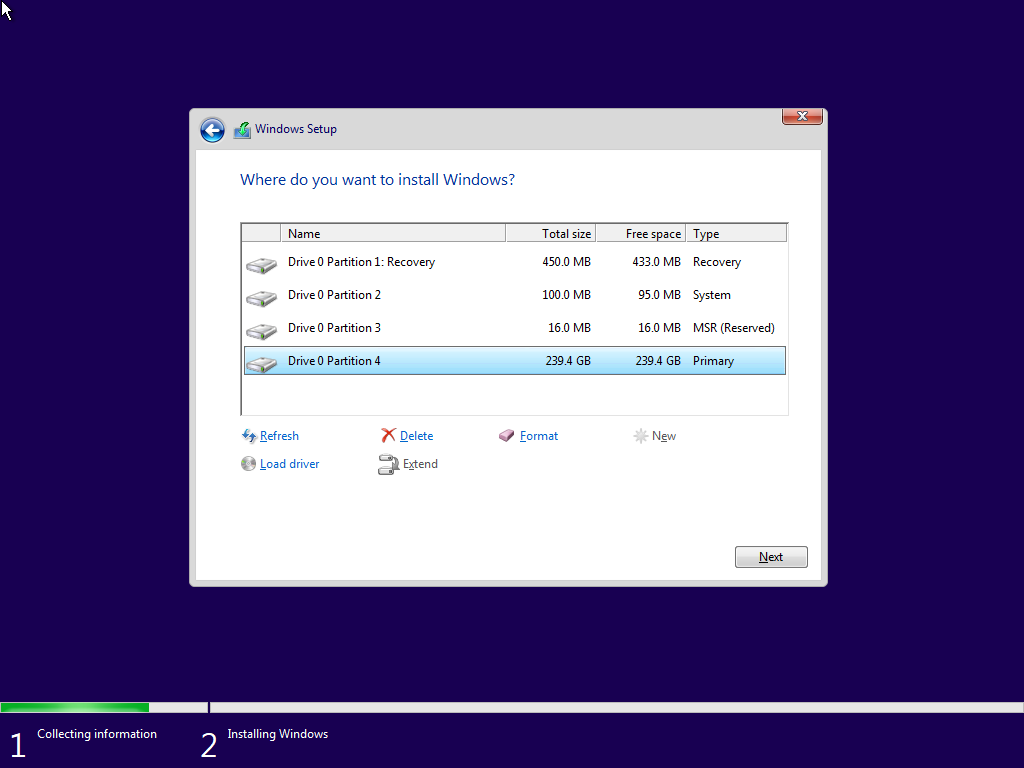
- Select the partition with the current installation of Windows 10 (usually "Drive 0"), and click the Delete button to remove the partition from the hard drive. If you see multiple partitions on the primary hard drive (Drive 0), select and delete each one. Windows 10 will recreate the required partitions during the installation process automatically. It's not necessary to remove the partitions on secondary drives.
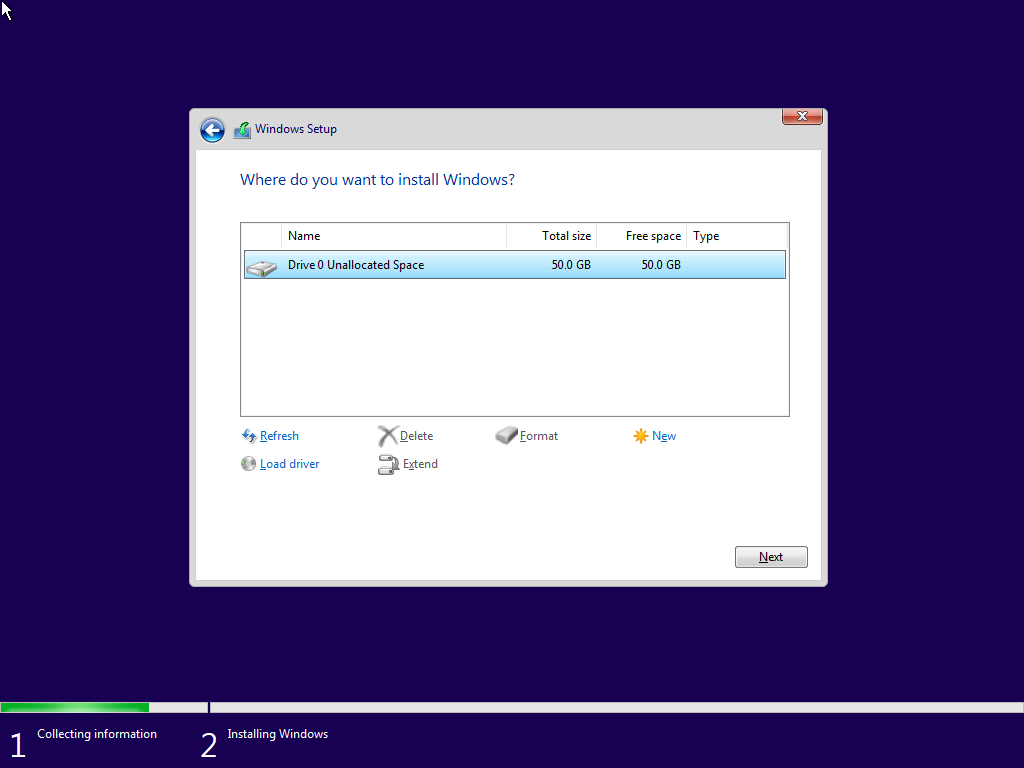
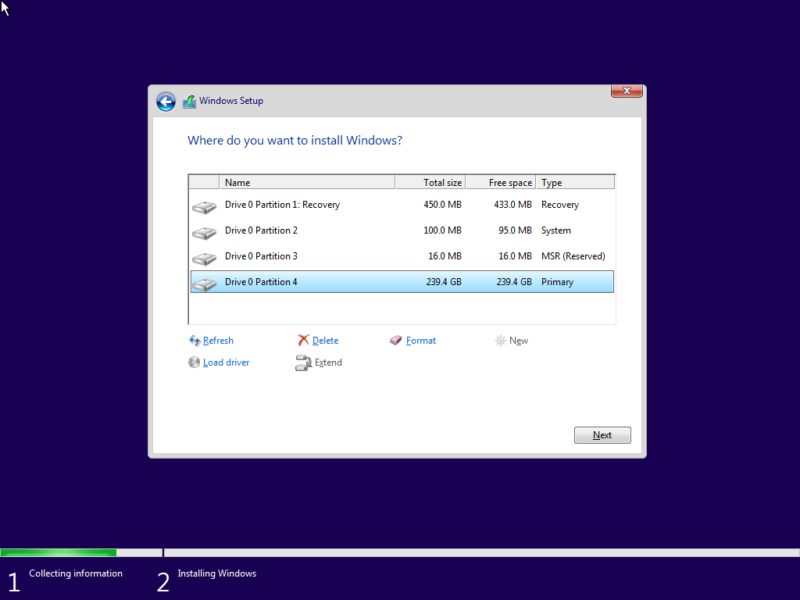 Warning: Deleting a partition also deletes all data within.
 - Select the Drive 0 Unallocated Space, and click the Next button.

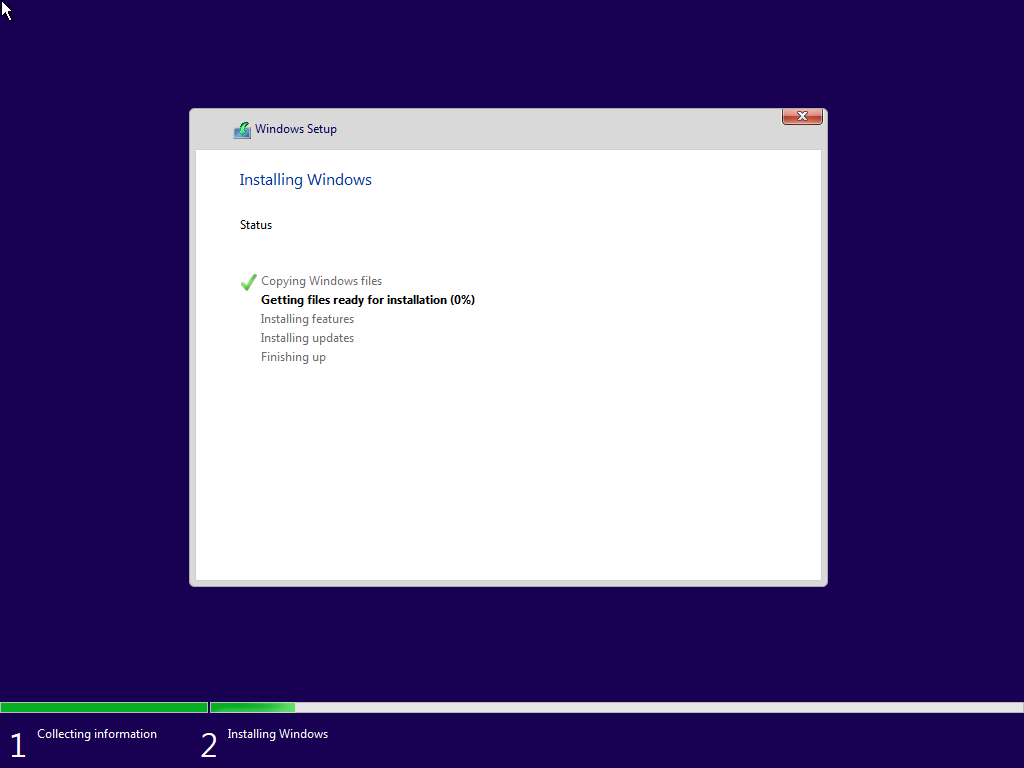
- Wait for Windows installation to complete, after the installation, you'll have to continue with the on-screen directions to finish the out-of-box experience (OOBE) to create a new account, set your preferences, and choose your preferred privacy settings.
 Note: Do not forcibly shut down or turn off the power while Windows 10 installation is in progress. Be sure that the AC adapter, if included with the product, is connected when proceeding with Windows 10 installation.
 - Once the installation is done, the Windows 10 setup automatically reboots at least once. Wait for the process to finish, if you see the prompt below, you can skip the waiting by pressing Restart now.
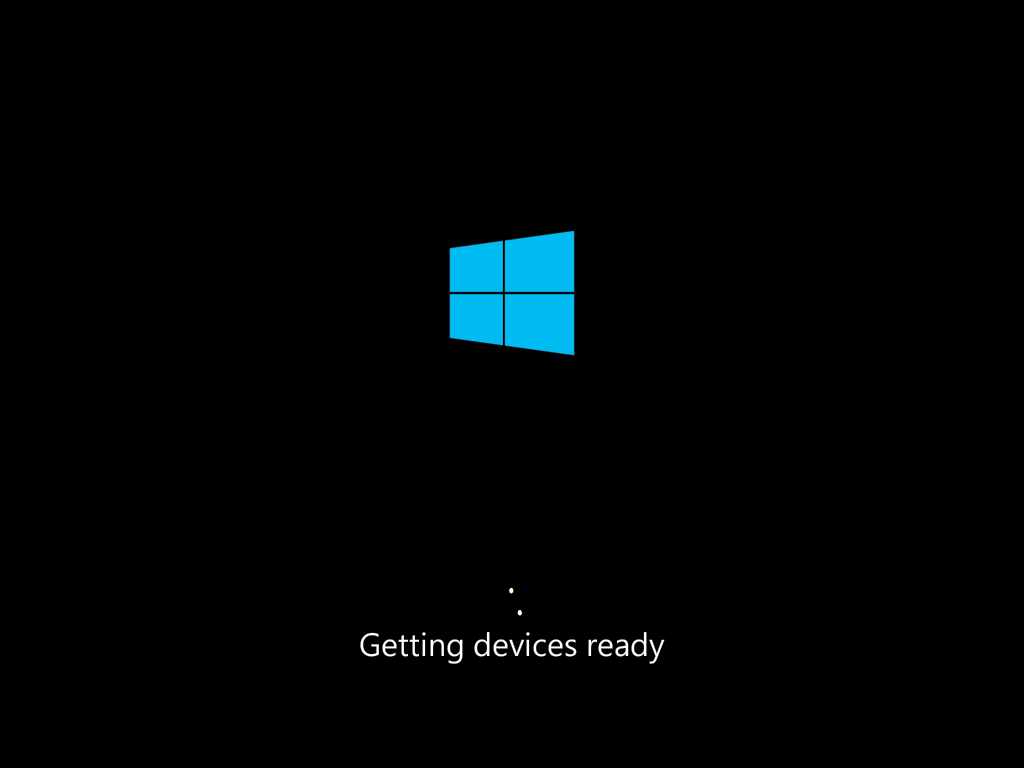
 While you wait, Windows 10 shows you the status of its “Getting ready” activities.
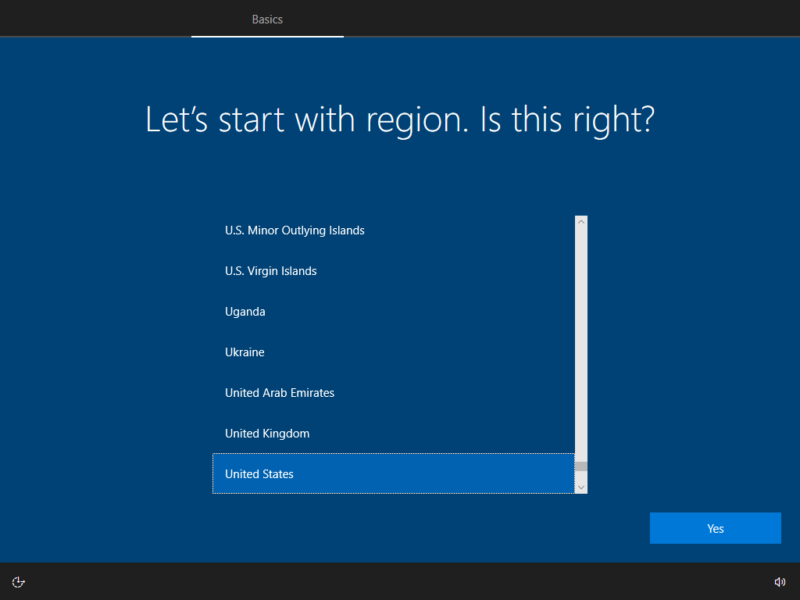
 During this installation step, you may witness a couple of restarts. Don't worry, it's all part of the process.
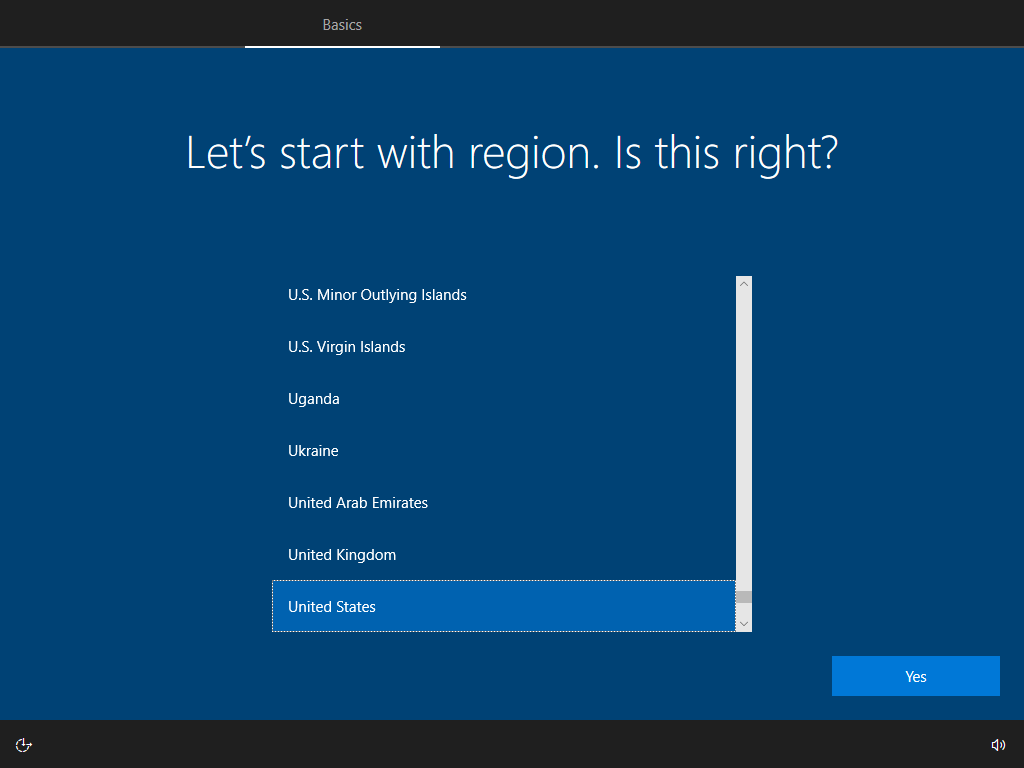
 - After the reboots are finished, select your country from the list, and then click Yes button.
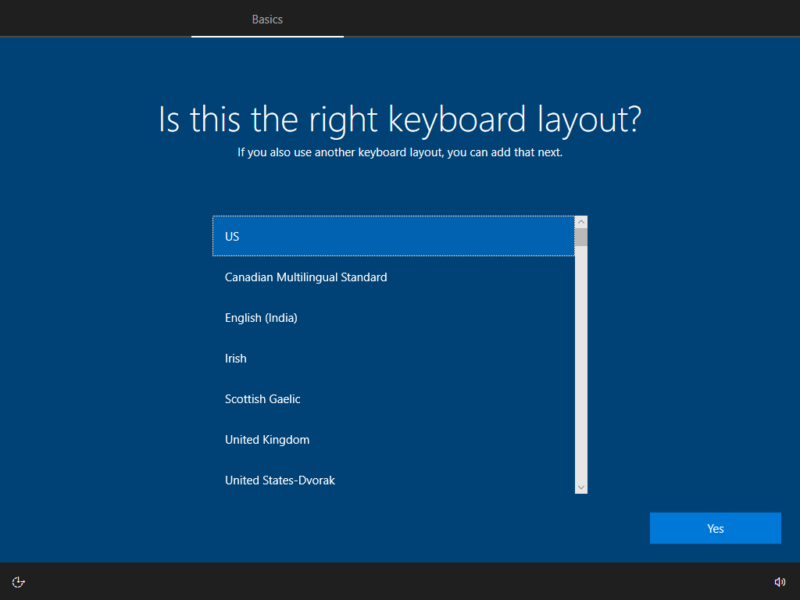
 Choose the keyboard you prefer from the list, and click Yes button.
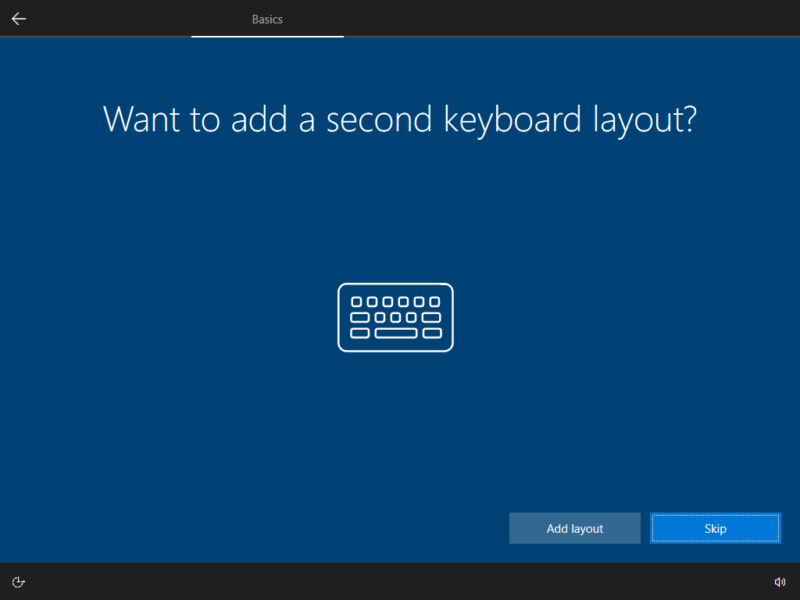
 Click the Skip button if you do not need to configure a second layout.
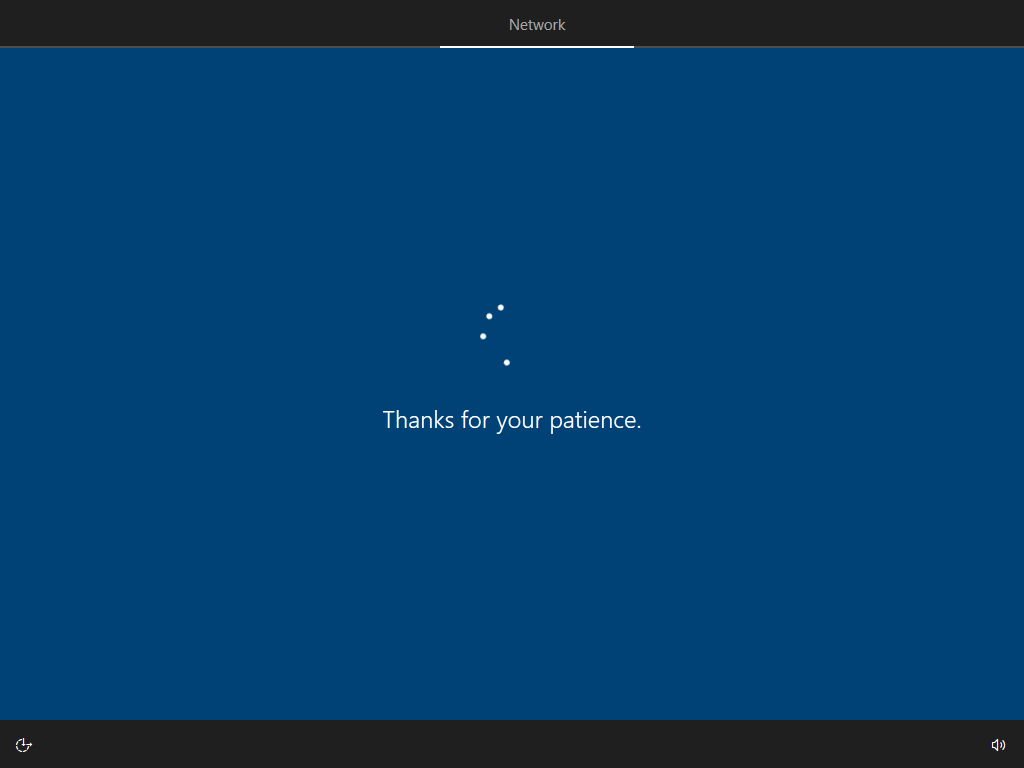
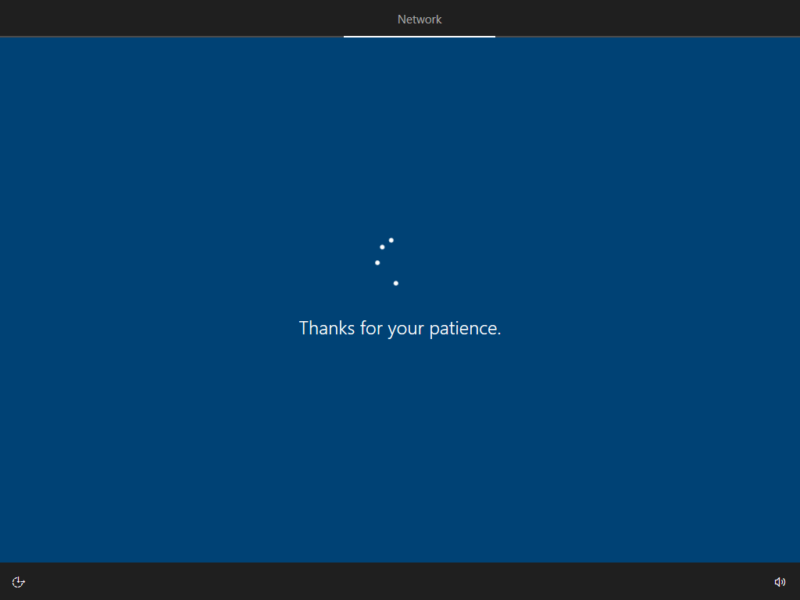
- If you have a working internet connection, Windows 10 checks if there are any updates available. You don't need to do anything during this step. Just wait.
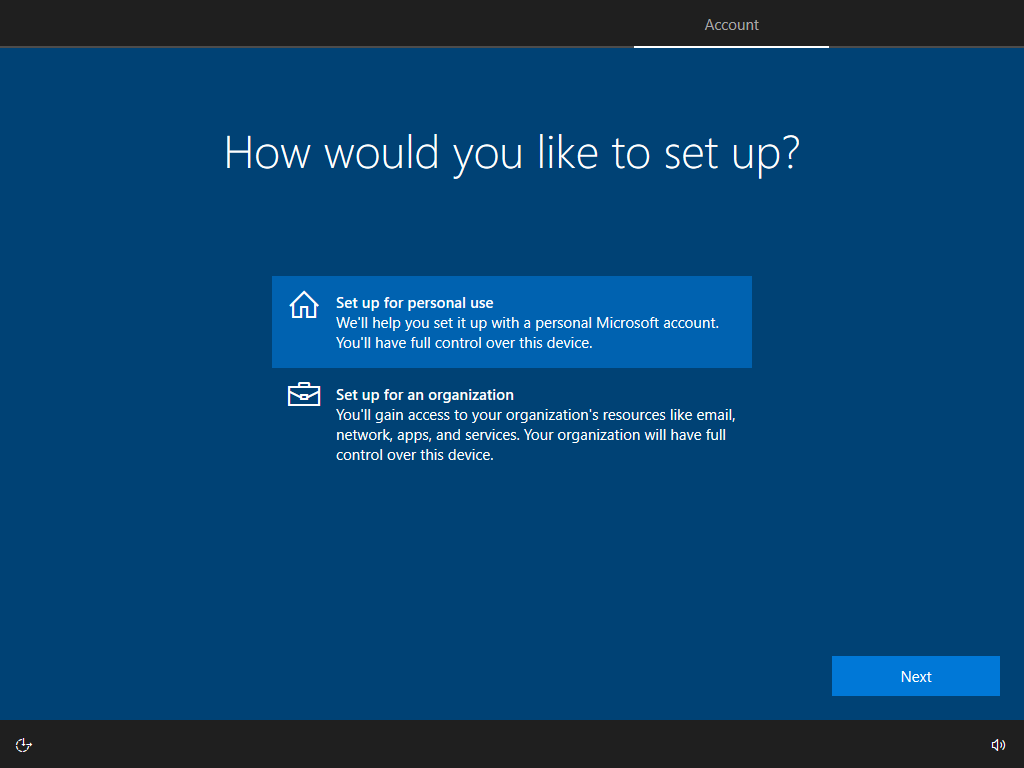
- If your computer belongs to an organization (for example, the company you work at), select “Set up for an organization” and use your business account to sign in and access your resources. Otherwise, choose “Set up for personal use” and press Next. Since this guide is for home users, this is also what I selected.

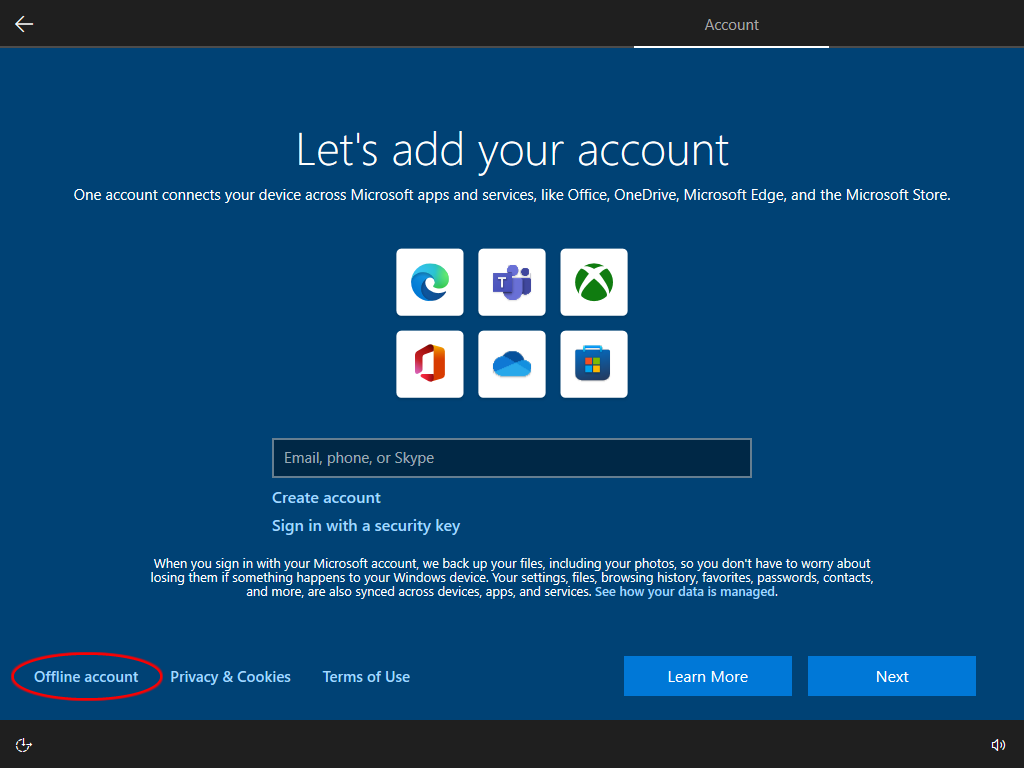
- Now we'll create the first user account which will also act as the administrator for this computer. Microsoft will push you towards using a Microsoft online account, but you can also set up an offline account. Click Offline account.
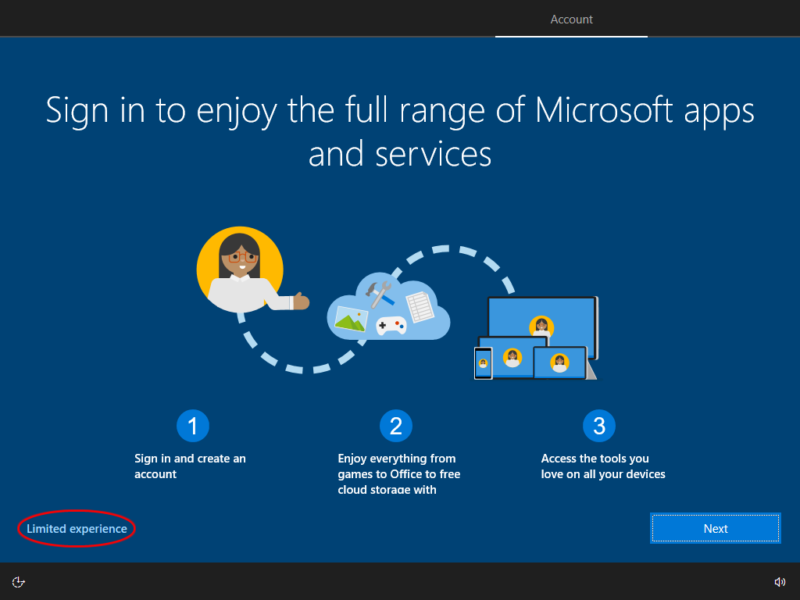
 Click Limited experience.
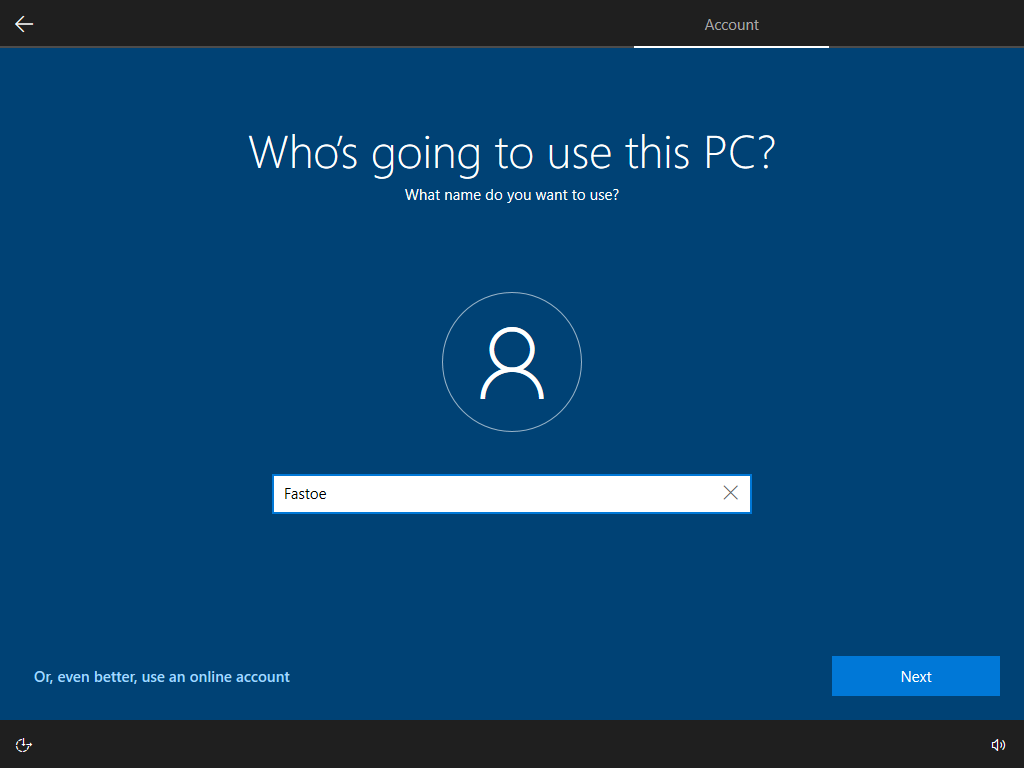
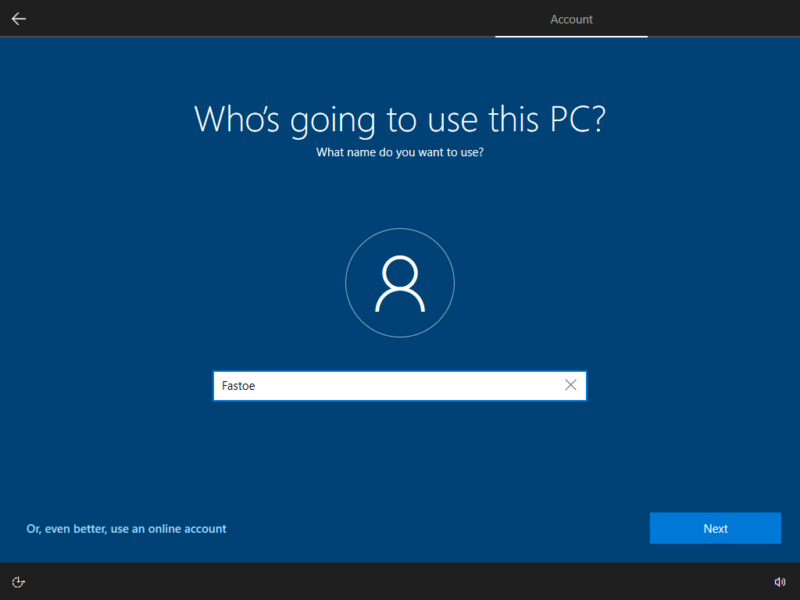
- Enter the user name and click Next button.
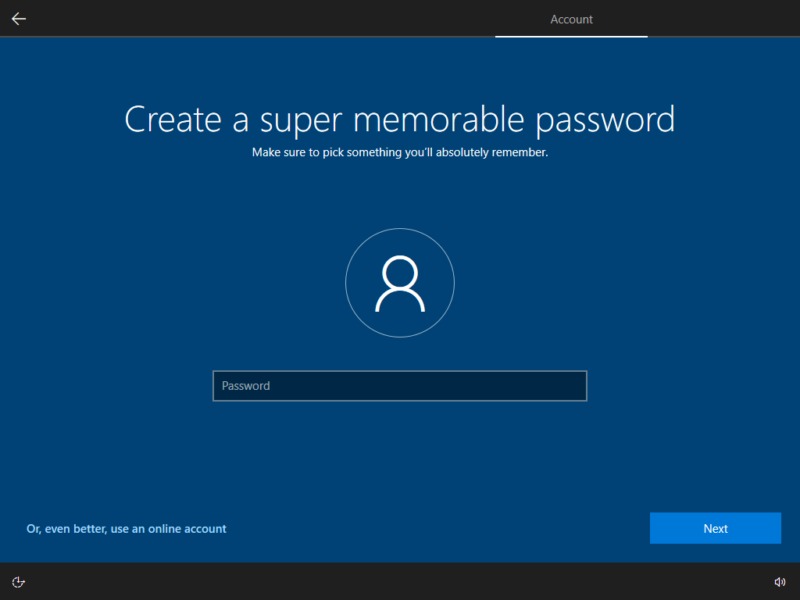
 Enter the password and click Next button.
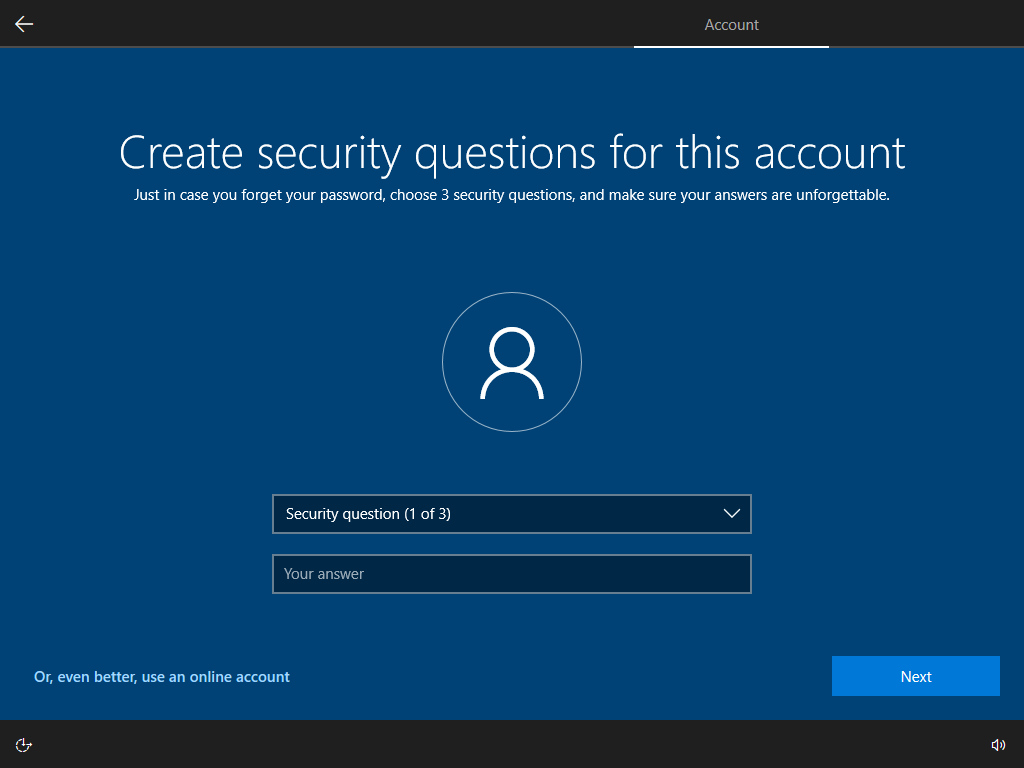
 Create the three security questions in case you have to recover your account password.

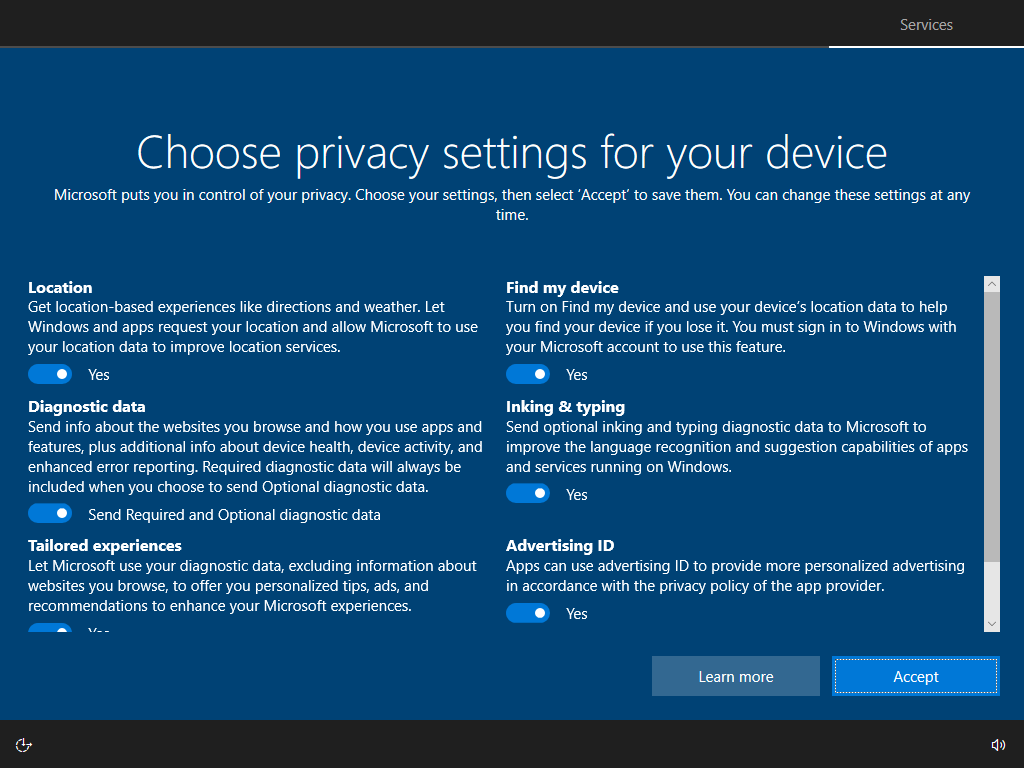
- Choose privacy settings for your device and click Accept button.

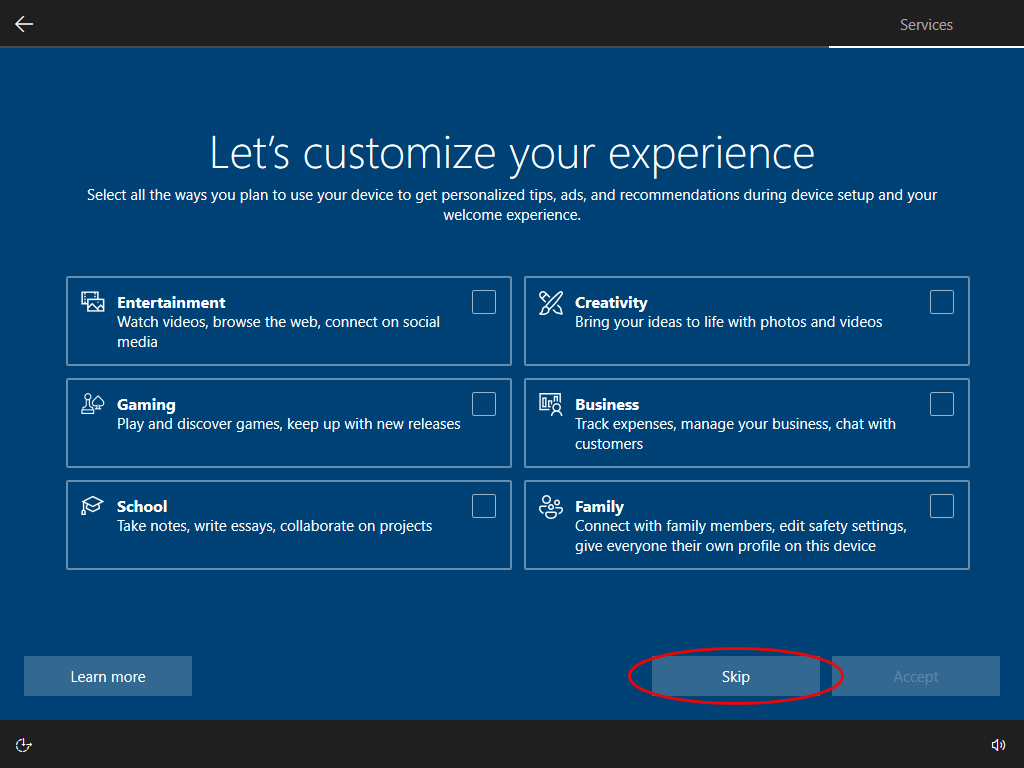
- Click the Skip button to skip this part of the setup.

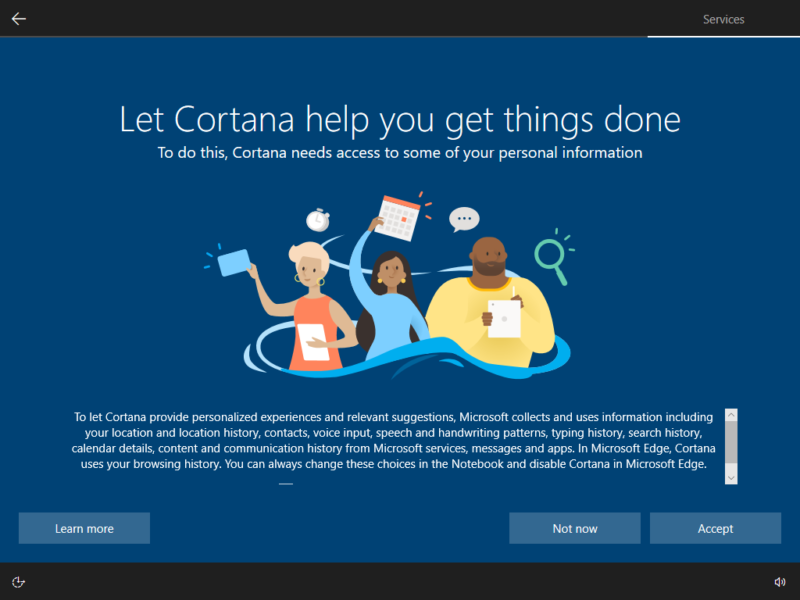
- Click the "Not now" button to disable Cortana.
 Once you complete the steps, Windows 10 will apply the settings and finish the setup.